Showing posts with label Hydrangea Hippo. Show all posts

Thursday, October 11, 2012

DIY Business Tools

Have you ever gone to an office supply store to find a tool you needed and they just don't seem to have it? As a small business owner, I collect email addresses from my customers and I need a place to store them. No store sells email sign up books!


Years ago I used my Bind-it-All to create my own email signup book! I created the "pages" in a word processing program, completely personalized with info for my unique business. Then I printed the pages, cut them apart, and then bound them with my Bind-it-All. After I took the email book with me to a few events, other business owners wanted one of their own! Here are some of the books I have made over the years for other business owners:


It's been super fun to make these books for some of my fellow vendors at Crafted as well as friends in the past. The book above was created for Rain Hannah of Honey & Ollie, a fabulous jewelry shop at Crafted

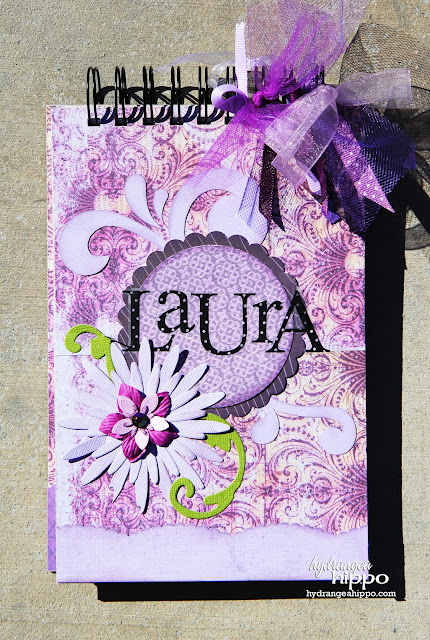
Here is another book I created for Laura Miller of Dove Chocolate Discoveries:


If you have brick and mortar shop, are a direct sales consultant (like Close to My Heart or Miche Bags), or just an independent business owner, email lists are essential to growing your business!


Guess what? Whenever you need a slick and classy business tool, look to your Bind-it-All for a solution. Think of your Bind-it-All outside of the craft room!

Happy Creating :)

Visit my blog at:

Thursday, September 27, 2012

Old Book Covers? Yes Please!


Jennifer Priest here with a fun Halloween mini I created using actual old book covers! Using book pages for decoupage and other projects, like wreaths, is so popular but what do you do with the leftover book coves? Many vintage books, like the reader's Digest Condensed book here, have old covers with a great patina and fabulous designs. They are great to repurpose as mini album covers like this:


Tie all kinds of lace and trim to the binding to give the book a spooky feel for Halloween!


The pages can be bigger than the covers, like this 5x7 Chipboard Covers and Glassine Bags I used here:


Consider wrapping pages with trim and tying it in a knot after the pages are bound--this eliminates the risk of accidentally punching through and cutting a trim.


Hope you enjoyed this book! And next time, before you throw those old book covers away,think about giving them new life with your Bind-it-All!


Visit my blog at:

Friday, September 7, 2012

Star Student

Hi everyone, Nancy here today to share with you a project I made with Back to School in mind.
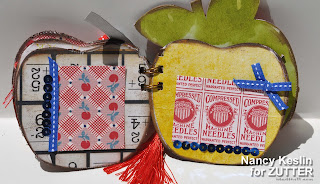
I started with cutting some chipboard I had using my Cricut, and then cut matching patterned papers from the  School House Vintage kit from Hydrangea Hippo.
 Some quick binding with my Bind it All and Antique Brass O-wires.
 And my mini album was ready to be filled with buttons and bits.
 All I need now is a few photos of my children's friends to complete.

Hope you are having a great day.

Hugs.

Nancy

Monday, August 27, 2012

A Sweet Baby Book, Start to finish

Jennifer Priest here with a quick little video showing how to make a mini book from start to finish using one of the kits in my etsy shop. 


This video features the Sweet Baby Girl Mini Book Kit from start to finish. This same tutorial can be used for the Sweet Baby Boy Kit or you can substitute your own paper and create a book with any theme. I hope you enjoy this -- it goes pretty quick!


Posted by Jennifer Priest

Saturday, August 4, 2012

Distrezzing It


Did you know you can Distrezz all 4 edges of your card bases? Yes, you can Distrezz the fold!!!


With a light hand, guide the folded side of the card through the Distrezz-it-All, from left to right as if reading the word "Zutter" printed on the machine. This gives a slight distressing to the edge. Then distress the other edges of the card. Ink them up with ColorBox Fluid Chalk Ink in Charcoal to make them really stand out!

The tattered edges look like worn fabric on this sewing themed card:


Here is how I made the card, using only paper scraps from my stash and a few stamps:
  1. Cut a card base to 5.5" x 8.5" and fold in half.
  2. Cut a piece of Grey Dot Patterned Paper to 4" x 5.25" and adhere to the card front. 
  3. Run the edges of the card,including the folded edge, through the Zutter Disztrezz-it-All. Ink the edges with ColorBox Fluid Chalk Ink in Charcoal.
  4. Apply a 1" x 4" strip of Patterned Paper to the lower right side of the card. Add two strips of washi tape over the paper.
  5. Stamp a sentiment onto a 1.75" circle punched from scrap paper. Mount to card using 3D Foam Tabs.
  6. Randomly stamps the background of the card with the scissors stamp using ColorBox Archival Dye In in Wicked Black.
  7. Punch one 1" circle and two 3/4" circles and mount to card with 3D Foam Dots.
Supplies:
  • Paper - Lily Bee, KaiserCraft
  • Washi Tape - Unknown
  • Ink - ColorBox Archival Dye Ink in Wicked Black and ColorBox Fluid Chalk Ink in Charcoal
  • Stamps - Stampin' Up!, Hero Arts
  • Punches- EK Success
  • Cardstock - Bazzill
  • Adhesive - Tombow USA
Here's another tip: Want an intense distressed look? Run the paper through the Distrezz-it-All from right to left, opposite the way you'd read the word "Zutter" on the machine. 


Posted by Jennifer Priest
hydrangeahippo.com


Friday, August 3, 2012

Is Your Bind-It-All Lonely?

Then never fear, Binding Buddy is here! Fresh from CHA, we're so excited to share with you about our two newest additions to the Zutter family:


Add-it-Alls and the Binding Buddy!

Here's a quick little video that shows you how both of these products work with your Bind-it-All V1.0 (blue) and V2.0 (pink):


We're offering a fabulous special offer for a limited time to those of you who already own a Bind-it-All machine!!!  Visit our website for all the details here: Binding Buddy PreSale


Tuesday, July 31, 2012

DIY With the BIA


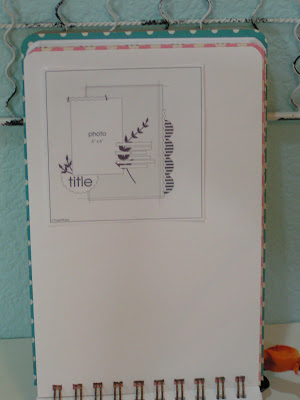
Jennifer Priest here to share with you a custom scrapbooking sketch book I created. It's one of those things you just can't buy because no one sells them.

I’ve been clipping sketches from magazines, printing them from the internet, and sketching my own over the years and I have amassed a large collection of bits and pieces of papers with sketches on them. I’ve seen sketch books made from Composition books but I wanted something totally customized to me. Enter the Bind-It-All!

I started my project by designing blank sketch pages on the computer. I set the margins to ½” on all sides but left about an inch on the bottom so that I had room to punch my binding holes. The pages are printed on 8.5x11 paper and then cut in half to create 8.5 x 5.5 pages. This is a nice size for taking in a crop bag, I think! I printed all the pages on both sides, creating single 12x12 sketch blanks on one side and double layout sketch blanks on the other side of each page.

After I printed and cut all the inner pages, I cut some blank pages to put in the back so I have a spot to glue sketches I’ve printed or cut from mags. You can put divider pages in if you want – I put one to separate sketches I make from the ones I printed or cut out.

To assemble the book, cut one Zutter Chipboard Cover down to 8.5"x11". Then cut it in half to make two 8.5"x5.5" covers. Cover with paper, then punch binding holes on the 5.5” side. Put the book in order with a cover, inner pages, and then a cover. Lay the back cover on the front cover so the outsides of the covers are facing each other. Insert binding wires and bind with the Bind It All. The rule of thumb for choosing wires for your project is to choose a wire with a diameter ¼” larger than your project is thick. Since I plan to glue things to the inside of my book, which will make it thicker over time, I am using an O-wire with ½” bigger diameter than my book is thick right now. Use the Binding Buddy to close all 9 loops of O-Wire at one time. After the book is bound, add a title and decorate! You can also use the Round It All to round the corners so they don’t get bent up while the book is stowed in your tote bag.


Supplies:
  • O-Wires, Chipboard Cover, Round It All, Binding Buddy – Zutter
  • Paper – The Paper Company, October Afternoon
  • Stickers – American Crafts, Making Memories, 7 Gypsies
  • Stamp – Scenic Route
  • Diecuts – October Afternoon, K&Company
  • Ink – Close to My Heart, Colorbox
  • Ribbon & Seam Binding -- Offray, May Arts, Making Memories

What book would you make that you can't find on the market to buy?

Visit my blog at: hydrangeahippo.com

Saturday, July 21, 2012

Bind a Holiday - and a Technique

Hi everyone!  Nancy here today to share with you a fun mini album I made with a super cute kit I picked up from the Hydrangea Hippo etsy store.  My family is heading off to Hawaii soon and I wanted to make a cute mini album to showcase a few of the photos I have yet to take.  LOL
I love these papers from Trinity Paper Arts and think they are just perfect for this project, especially after a quick trip through my Distrezz-it-All to get the lovely worn edges.
I love making small albums to showcase a few special photos, and my Bind-it-All is makes it quick and easy to get to the fun part (for me anyway), embellishing.


I really love the added opportunities working with o-wires brings to my minis.  For this book, not only did I attach lots of buttons, beads, ribbons and other baubles to the o-wires; but I changed the color of the white o-wires to match the project.

This was a simple process involving a few alcohol markers (Bic Mark-its) that coordinated with my papers...
and my o-wires.  I simply colored the o-wires with the markers and then allowed the wire time to dry before binding.
Here you can see a close up of my fully embellished o-wires.
Thanks for stopping by today.

Hugs.

Nancy Keslin

Thursday, July 19, 2012

A Day Out


Hi there everyone! Are we all hyped up
on CHA?!!!
Are we all excited about Zutter's
cool new product?!!!!
I just bet we are!


Well, I for one can't wait to get
my crafty little fingers
on some that's for sure.
Until then we can still play
and come up with some great
creative ideas.
I call this one
A Day Out.
This project was actually inspired
by a day out. It was a day
that I got a chance to meet Jennifer Priest
for the first time and 
made some goodies with the
Bind-It-All 2.0!
I only had a chance to create the
base of this project
but brought it back home
to finish it up.
I couldn't let this project just sit.


Just a few little sweet accents
that reminds me of the fresh
outdoors. 
I wish I had a bike just
like this one. 
Wheels and all!
It sure was a beautiful day
that day and I really wanted
this project to reflect that.
Maybe we all can
get outside, breathe the fresh air,
take in a few sun rays,
and get inspired together!
Thank you for letting me share!


             2. 3/4 Antique Brass Owire
          3. 3/4 Clip-board Covers
                          4. Hydrangea Hippo Sew Sweet Kit
                        5. Studio Calico Blue Grass Mister
                         6. Clearsnap Candle Glow Smooch
               7. Hydrangea Hippo Buttons
          8. Elle's Studio Pink Tags
9. Bo Bunny Paper


                                                              truedivinehand

Thursday, June 21, 2012

Coffee Sleeves and Instagram

Hi everyone!  Nancy here today to share with you a project I made using some coffee sleeves and my favorite binding tool, the Bind-it-All.


I love using my phone to take photos and have taken bunches of shots using Instagram.  This small format was perfect for these low resolution photos.
I really put my Distrezz-it-All to work to create the shabby chic look I was after. Placing the papers over the coffee sleeves. And then binding with 1 inch Antique Brass O-Wires.
I used lots of different trims and flowers from the Hydrangea Hippo store to coordinate with my Prima Marketing papers.
The size of this album was just perfect for using up some scraps I had lying around from previous projects.
So, have you ever used the Distrezz-it-All?


Hugs.


Nancy