Showing posts with label Album. Show all posts

Thursday, September 27, 2012

Old Book Covers? Yes Please!


Jennifer Priest here with a fun Halloween mini I created using actual old book covers! Using book pages for decoupage and other projects, like wreaths, is so popular but what do you do with the leftover book coves? Many vintage books, like the reader's Digest Condensed book here, have old covers with a great patina and fabulous designs. They are great to repurpose as mini album covers like this:


Tie all kinds of lace and trim to the binding to give the book a spooky feel for Halloween!


The pages can be bigger than the covers, like this 5x7 Chipboard Covers and Glassine Bags I used here:


Consider wrapping pages with trim and tying it in a knot after the pages are bound--this eliminates the risk of accidentally punching through and cutting a trim.


Hope you enjoyed this book! And next time, before you throw those old book covers away,think about giving them new life with your Bind-it-All!


Visit my blog at:

Thursday, September 20, 2012

Keep Forward


Hello Zutter world!
Today we are going to take a little
look at my Keep Forward album.

Big Picture just had a festival
Big Ideas Festival in which there
were a series of in depth challenges
for us to search a little deeper into
what we do.
For this particular challenge it
was to set up a layout or page
of that one goal or dream
we are working on.
I decided to set  up an album
to place my goals in but it doesn't 
stop there.
We actually have to move on them
meaning whether it be something small
or big each day just take a step or
two towards that goal.
I have quite a few but there are
key goals that take priority over all.
This album will be dedicated to
those.

           
There are a number of hard cover pages
and Zutter inserts so that I will
have plenty of space to document
my step-by-step process.
This particular album will be
put to good use for sure.
Hopefully we all will continue to
challenge ourselves to dig a little
deeper in our craft and 
continue to grow in it.
Thank you as always for letting me share!


5. Pink Paislee Digital Kit Happy Now
6. Bella Blvd. Stickers Sophisticates 
7. Echo Park This and That Stickers
8. Prima Stamps
9. Elle's Studio Tags
10. K&Company Smash Marker


Sunday, August 19, 2012

In The City


Greeting to all today!
I take it that school is now in
session for everyone.
I just finished myself registering
and can't wait to get started.
With a little bit more extra time
for us crafters I am sure
we are making good use of
it with some extra creating.

Here is an album I created
titled In The City. Hubby
and I spend quite some time
out and about on the
bus to different places.
It is interesting to capture those
unplanned moments on
the move. This album
was born for such memories.
Enjoy!


Downtown

Santa Monica

Checking bus schedule

So much to see,
so much to snap!
Thanks so much for stopping by
and letting me share! It is
always a pleasure


.
3. SEI Mulberry Kit
4. Prima Say-It-With-Crystals
5. Momenta Travel Dimensional Stickers
6. DCWV School Paper Pack


Tuesday, July 3, 2012

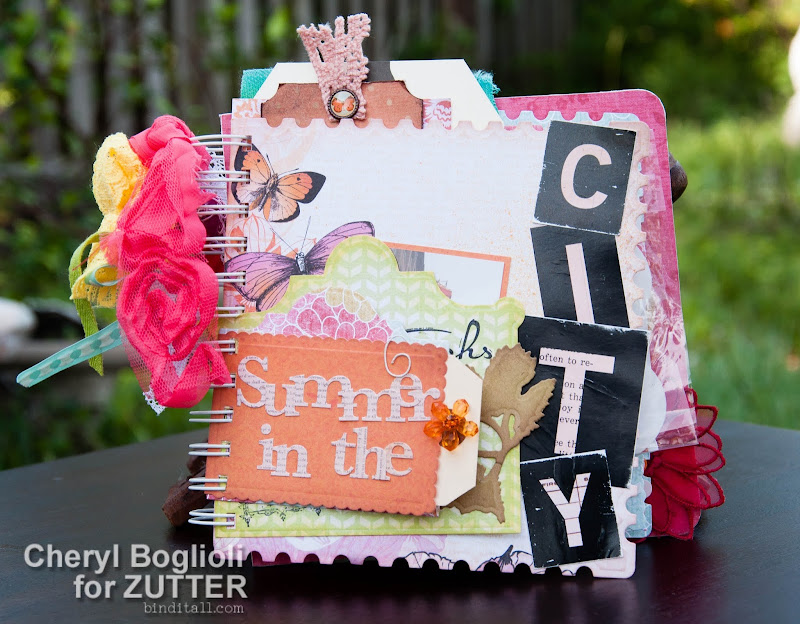
Summer in the City Mixed Media Album

Summer in the City

Hi, Cheryl here again, from Cheryl’s Window, and here is what is in my studio today.  

It is summer, and being from Florida, most expect beach themes from me. Unfortunately, I am not a beach girl.  CHA is coming up and last summer was my first CHA experience.  The day before CHA started, I had the chance to go into Chicago and experience THE CITY!  And it was so very hot, but it was exhilarating for me- the sights, the sounds, the smells, the people!

I had so much fun listening to this song and building my own mini album using Spellbinder dies designed by Donna Salazar.  I used Creative Book Pages One and Two as well as a few butterflies from her Wonderful Wings Grand Nestabilities collection. 

I created this mixed media album using chipboard for the back page to give my book stability as well as a variety of papers, tags, time card, plastic baggy, envelopes, and a piece of raw canvas.

Before I show you the entire album, I thought I’d share some of the creation process.
I used Zutter Chipboard cover for the back page of my album.  This provided structure and stability for my mixed album.  However, 8x8 was larger than I wanted, so I used my Zutter Kutter to cut down the board to 7 x 7 and then I rounded two outer corners with the Zutter Corner Rounder.
I inked edges and embossed a few embellishments using various products from ClearSnap.  I also colored and shaded with some with Faber-Castell Gelatos, even while using the die as a stencil.

I had so much fun putting this album together.   It is bright and happy and very summery to me. 
Want to peek inside my album?
Just look at all that layered yumminess.  I still have a few picture spots to fill and I’m trying to decide whether to add more from this trip or add some new pictures from my visit in a few weeks back in Chicago for CHA Summer 2012!

What are your plans for this summer?  Will you make a summer album?  Make sure to share on the BIA Facebook page if so.  We love seeing your creations using Zutter products.

Saturday, June 9, 2012

Animal Crackers Pocket Album Tutorial

How are we all doing today! I hope all
is well especially now that summer is
in full gear.
Today we will be putting together a pocket
album which is super easy and fun!
With a few simple supplies this
album turns out stunning.
Let's begin!!!

Select a few sheets of 12x12 paper which
will in turn be your pockets.
Evenly measure out 4 inches across which
will render 3 strips that will create pockets. It is totally up to you
how many pockets you want in
your album.


Take one of your strips and score/fold about
6 1/2 in mark horizontally.

Measure about 1/2" in on both sides
vertically also scoring/folding at marks.

It looks like so:

At the horizontal folds cut both corners
in an angle like so (see photo). This will make it
easier to fold the sides in clean and neat.

Apply glue to the insides of the 6 1/2 in. sides
and adhere down.

To the other sides, apply glue to the
outside of the sides, fold in half, and adhere
to the other end.

It will look like this!
Easy, right!?

Now gather the rest of the strips and 
repeat the same steps.


If you desire, a half hole can be cut out
of the shorter end of pocket to
create a notched look.
Make sure that it is cut out first
before adhering. 

After all the pockets are dry break out
your Bind-it-All and start punching away.

After assembly, you will have your
very own pocket album to
embellish to your heart's content.
The pockets also serve as extra places for
pictures, notes, etc.!!!
Here is what I did with mine:
                                        I love the end result. Now this album is ready for some
                                                                     great memories.


                                                   Hope that you enjoyed this post and please share your
                                                   pocket album. We would love to see it!!!


Supplies:
  • Bind-It-All V2.0
  • Pink 3/4" Owire
  • Sassafras
  • Basic Grey
  • Echo Park
  • American Crafts
  • Cosmo Cricket
  • Momenta
  • Lily Bee                                        


                                                              truedivinehand.blogspot.com
.