Showing posts with label page protectors. Show all posts

Thursday, September 20, 2012

Keep Forward


Hello Zutter world!
Today we are going to take a little
look at my Keep Forward album.

Big Picture just had a festival
Big Ideas Festival in which there
were a series of in depth challenges
for us to search a little deeper into
what we do.
For this particular challenge it
was to set up a layout or page
of that one goal or dream
we are working on.
I decided to set  up an album
to place my goals in but it doesn't 
stop there.
We actually have to move on them
meaning whether it be something small
or big each day just take a step or
two towards that goal.
I have quite a few but there are
key goals that take priority over all.
This album will be dedicated to
those.

           
There are a number of hard cover pages
and Zutter inserts so that I will
have plenty of space to document
my step-by-step process.
This particular album will be
put to good use for sure.
Hopefully we all will continue to
challenge ourselves to dig a little
deeper in our craft and 
continue to grow in it.
Thank you as always for letting me share!


5. Pink Paislee Digital Kit Happy Now
6. Bella Blvd. Stickers Sophisticates 
7. Echo Park This and That Stickers
8. Prima Stamps
9. Elle's Studio Tags
10. K&Company Smash Marker


Friday, November 12, 2010

ATC Storage In A Jiffy with the Display-it-All (and more!)

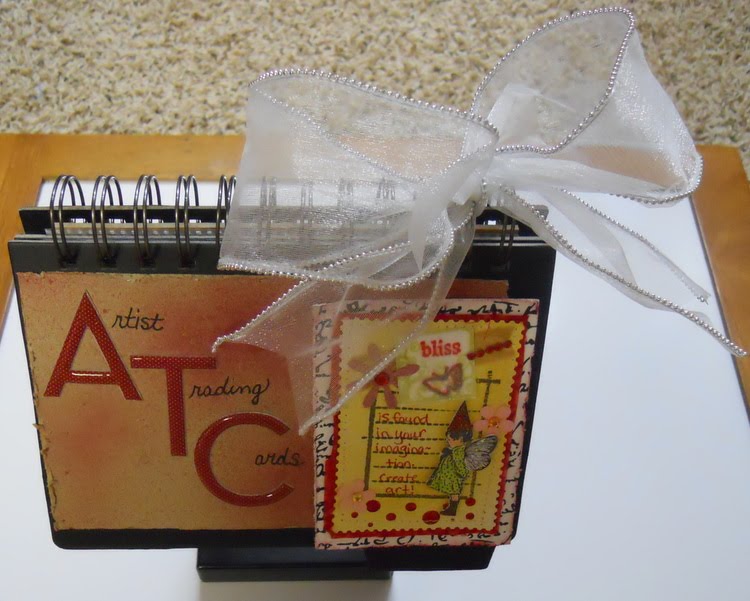
Hellllllooooooooooo everybody! How the heck are you all doing today? Fab? Super fab? I sure hope so! Today I would like to share an easy peasy way to display your ATCs. If you aren't sure what ATCs are, they are just fun little cards ~ Artist Trading Cards that you create and trade with your crafty buddies. (I love participating in ATC swaps, and have some favs from swaps at Scrapbook News and Reviews to name one place.) Anyway, I wanted a fun way to display some of my ATCs, but didn't want to spend boatloads of time creating it. I decided to use one of the Zutter Display-It-Alls with a Tabbed Folder Album I had stashed. I also used the super easy to use Zutter Pre-Punched Page Protectors to hold my ATCs, and tied a fun wired edge ribbon to the owires when I was done. Of course my pink Bind-It-All V2.0 made super quick work of the whole project, especially since the page protectors are already punched, you just need to bind them in your album.  WOOOO HOOO, can you say warp speed fast?  ;)

Here is the front ~

Here is the back ~


Here is a peek inside ~


Another peek ~


Super quick and easy!  Plus the focus is on my ATCs, and with the clear page protectors I can see both sides of the cards!  I love that.  I also love the fact that I can easily add more pages if I want to, I just need to pop some of the Moveable Page Protectors in there, then load them up.  Easy Peasy, gotta love that! Create one yourself, you will be glad you did. I would love to see it if you do, just pop over to the Zutter Zisters Message Board and post a pic when you are done.  :) 
Have fun creating! ~ Pam 


Zutter Zister DT Member Pam Sandy

Sunday, December 20, 2009

Christmas/New Years Page Protector Banner!

I LOVE banner/garlands whatever you want to call them....I LOVE them! When I received by box of goodies from Zutter and saw these 8x8 page protectors I knew exactly what I wanted to do! I wanted to make a multipurpose banner for Christmas into the New Year and I will show you how you can create one too!

Supplies: Zutter 8x8 page protectors, fabric cut into 3 inx10 strips, ribbon, pins, sewing machine, patterned/plain paper or photos!

Let's get started!!!

1.First cut a piece of fabric 3 inches by 10 inches.

2. Fold over a 3/4 inch and iron flat.


3. Align your page protector onto the folded piece. Trim.


4. Fold over the other side of the fabric to align with the first folded part, align your ribbon with the wrong side facing up and pin to page protector.


5. It should look like this when the folding and pinning are done. Now you just need to sew on the front of the banner's fabric piece. Now your ribbon is attached to the back of your fabric covered page protector piece and is ready to hang!

What I love most about this project is that you can make it as long or short as you would like. You can spell anything you want. Even better is that you can use it for any occasion you choose. I made mine for Christmas and New Years! This would be a great project to make for a child's birthday by spelling their name! It would also be a cool way to display photos or 8x8 scrapbook pages. Really, the applications here are endless! I used the 8x8 page protectors in my garland. The 4x6 page protectors will work too but you will only have a horizontal choice (6x4). All you need to do is make this project happen after your sewing is to add an insert for the size of page protector you are using and your banner is done! This project can personalized and embellished to your liking!