Showing posts with label Jennifer Priest. Show all posts

Thursday, October 11, 2012

DIY Business Tools

Have you ever gone to an office supply store to find a tool you needed and they just don't seem to have it? As a small business owner, I collect email addresses from my customers and I need a place to store them. No store sells email sign up books!


Years ago I used my Bind-it-All to create my own email signup book! I created the "pages" in a word processing program, completely personalized with info for my unique business. Then I printed the pages, cut them apart, and then bound them with my Bind-it-All. After I took the email book with me to a few events, other business owners wanted one of their own! Here are some of the books I have made over the years for other business owners:


It's been super fun to make these books for some of my fellow vendors at Crafted as well as friends in the past. The book above was created for Rain Hannah of Honey & Ollie, a fabulous jewelry shop at Crafted

Here is another book I created for Laura Miller of Dove Chocolate Discoveries:


If you have brick and mortar shop, are a direct sales consultant (like Close to My Heart or Miche Bags), or just an independent business owner, email lists are essential to growing your business!


Guess what? Whenever you need a slick and classy business tool, look to your Bind-it-All for a solution. Think of your Bind-it-All outside of the craft room!

Happy Creating :)

Visit my blog at:

Thursday, September 27, 2012

Old Book Covers? Yes Please!


Jennifer Priest here with a fun Halloween mini I created using actual old book covers! Using book pages for decoupage and other projects, like wreaths, is so popular but what do you do with the leftover book coves? Many vintage books, like the reader's Digest Condensed book here, have old covers with a great patina and fabulous designs. They are great to repurpose as mini album covers like this:


Tie all kinds of lace and trim to the binding to give the book a spooky feel for Halloween!


The pages can be bigger than the covers, like this 5x7 Chipboard Covers and Glassine Bags I used here:


Consider wrapping pages with trim and tying it in a knot after the pages are bound--this eliminates the risk of accidentally punching through and cutting a trim.


Hope you enjoyed this book! And next time, before you throw those old book covers away,think about giving them new life with your Bind-it-All!


Visit my blog at:

Monday, August 27, 2012

A Sweet Baby Book, Start to finish

Jennifer Priest here with a quick little video showing how to make a mini book from start to finish using one of the kits in my etsy shop. 


This video features the Sweet Baby Girl Mini Book Kit from start to finish. This same tutorial can be used for the Sweet Baby Boy Kit or you can substitute your own paper and create a book with any theme. I hope you enjoy this -- it goes pretty quick!


Posted by Jennifer Priest

Saturday, August 4, 2012

Distrezzing It


Did you know you can Distrezz all 4 edges of your card bases? Yes, you can Distrezz the fold!!!


With a light hand, guide the folded side of the card through the Distrezz-it-All, from left to right as if reading the word "Zutter" printed on the machine. This gives a slight distressing to the edge. Then distress the other edges of the card. Ink them up with ColorBox Fluid Chalk Ink in Charcoal to make them really stand out!

The tattered edges look like worn fabric on this sewing themed card:


Here is how I made the card, using only paper scraps from my stash and a few stamps:
  1. Cut a card base to 5.5" x 8.5" and fold in half.
  2. Cut a piece of Grey Dot Patterned Paper to 4" x 5.25" and adhere to the card front. 
  3. Run the edges of the card,including the folded edge, through the Zutter Disztrezz-it-All. Ink the edges with ColorBox Fluid Chalk Ink in Charcoal.
  4. Apply a 1" x 4" strip of Patterned Paper to the lower right side of the card. Add two strips of washi tape over the paper.
  5. Stamp a sentiment onto a 1.75" circle punched from scrap paper. Mount to card using 3D Foam Tabs.
  6. Randomly stamps the background of the card with the scissors stamp using ColorBox Archival Dye In in Wicked Black.
  7. Punch one 1" circle and two 3/4" circles and mount to card with 3D Foam Dots.
Supplies:
  • Paper - Lily Bee, KaiserCraft
  • Washi Tape - Unknown
  • Ink - ColorBox Archival Dye Ink in Wicked Black and ColorBox Fluid Chalk Ink in Charcoal
  • Stamps - Stampin' Up!, Hero Arts
  • Punches- EK Success
  • Cardstock - Bazzill
  • Adhesive - Tombow USA
Here's another tip: Want an intense distressed look? Run the paper through the Distrezz-it-All from right to left, opposite the way you'd read the word "Zutter" on the machine. 


Posted by Jennifer Priest
hydrangeahippo.com


Friday, August 3, 2012

Is Your Bind-It-All Lonely?

Then never fear, Binding Buddy is here! Fresh from CHA, we're so excited to share with you about our two newest additions to the Zutter family:


Add-it-Alls and the Binding Buddy!

Here's a quick little video that shows you how both of these products work with your Bind-it-All V1.0 (blue) and V2.0 (pink):


We're offering a fabulous special offer for a limited time to those of you who already own a Bind-it-All machine!!!  Visit our website for all the details here: Binding Buddy PreSale


Tuesday, July 31, 2012

DIY With the BIA


Jennifer Priest here to share with you a custom scrapbooking sketch book I created. It's one of those things you just can't buy because no one sells them.

I’ve been clipping sketches from magazines, printing them from the internet, and sketching my own over the years and I have amassed a large collection of bits and pieces of papers with sketches on them. I’ve seen sketch books made from Composition books but I wanted something totally customized to me. Enter the Bind-It-All!

I started my project by designing blank sketch pages on the computer. I set the margins to ½” on all sides but left about an inch on the bottom so that I had room to punch my binding holes. The pages are printed on 8.5x11 paper and then cut in half to create 8.5 x 5.5 pages. This is a nice size for taking in a crop bag, I think! I printed all the pages on both sides, creating single 12x12 sketch blanks on one side and double layout sketch blanks on the other side of each page.

After I printed and cut all the inner pages, I cut some blank pages to put in the back so I have a spot to glue sketches I’ve printed or cut from mags. You can put divider pages in if you want – I put one to separate sketches I make from the ones I printed or cut out.

To assemble the book, cut one Zutter Chipboard Cover down to 8.5"x11". Then cut it in half to make two 8.5"x5.5" covers. Cover with paper, then punch binding holes on the 5.5” side. Put the book in order with a cover, inner pages, and then a cover. Lay the back cover on the front cover so the outsides of the covers are facing each other. Insert binding wires and bind with the Bind It All. The rule of thumb for choosing wires for your project is to choose a wire with a diameter ¼” larger than your project is thick. Since I plan to glue things to the inside of my book, which will make it thicker over time, I am using an O-wire with ½” bigger diameter than my book is thick right now. Use the Binding Buddy to close all 9 loops of O-Wire at one time. After the book is bound, add a title and decorate! You can also use the Round It All to round the corners so they don’t get bent up while the book is stowed in your tote bag.


Supplies:
  • O-Wires, Chipboard Cover, Round It All, Binding Buddy – Zutter
  • Paper – The Paper Company, October Afternoon
  • Stickers – American Crafts, Making Memories, 7 Gypsies
  • Stamp – Scenic Route
  • Diecuts – October Afternoon, K&Company
  • Ink – Close to My Heart, Colorbox
  • Ribbon & Seam Binding -- Offray, May Arts, Making Memories

What book would you make that you can't find on the market to buy?

Visit my blog at: hydrangeahippo.com

Wednesday, July 25, 2012

Introducing Add-it-Alls and the Binding Buddy!

Fresh from CHA, we're so excited to share with you about our two newest additions to the Zutter family:


Add-it-Alls and the Binding Buddy!

Here's a quick little video that shows you how both of these products work with your Bind-it-All V1.0 (blue) and V2.0 (pink):


We're offering a fabulous special offer for a limited time to those of you who already own a Bind-it-All machine!!!  Visit our website for all the details here: Binding Buddy PreSale


Thursday, July 12, 2012

Last Chance--ONLY Zutter Certification Course in 2012!!!!


Our design and product experts have developed this course based on years of teaching Zutter products, tools, and techniques to customers both in-person and online. You will receive instruction on all Zutter tools and products, as well as marketing tips and materials, plus we'll create several projects in the course that can be used to develop your own unique Zutter class offerings. 

In addition, Certified Instructors will receive a certificate in class, be offered discounts on supplies and tools for teaching, be listed on the Bind-It-All blog, be referred to retailers requesting classes, and receive on-going support from our Education Coordinator and Regional Certification Instructors. At the end of the course, you will earn your certificate by demonstrating the techniques learned during the course practicum. 

We're launching this program at CHA in Chicago this summer with very limited seating. We want your certification as an instructor to be a unique and special qualification you can offer your retail stores and customers so with that in mind, we are limiting the number of certifications that will be presented. 

The course will be held at the Donald E. Stevens Convention Center in Rosemont, IL on July 15, 2012. 

To request an application, please email your resume, a brief summary about your teaching experience, blog link, name, and address to zuttercert@gmail.com. 

Applications will be reviewed and approved as received, on a first-come, first-served basis. A fee schedule will be sent to you with your application. Travel arrangement and hotel accommodations are not provided. Please direct all questions to zuttercert@gmail.com.

We are very excited to be able to offer this opportunity for instructors and designers and look forward to seeing you in Rosemont!

Thank you!!!!!!!!

Wednesday, May 2, 2012

Go Beyond the Book!!


Spring Online Classes  
with Zutter & My Creative Classroom!
Whether you are new to the Bind-it-All, or a seasoned pro, we've got a class for you!

Jennifer Desktop Calendar  

You've either already taken the Bind-it-All 101 course or you're familiar with using the Bind-it-All. In this course, we'll take binding to the next level, creating several projects using the Bind-It-All tool and accessories, like the Round-It-All, OWires, and Cover-Alls. It's not about the basics anymore - we'll learn techniques for addressing challenging binding situations such as binding irregular shaped pages, binding on the edges of a project, binding pages of various sizes, creating projects besides books, tips for fixing mistakes, and more.

Lesson One: Binding Pages of Varying Sizes
Lesson Two: Binding On the Edge
Lesson Three: Creating Projects 
Lesson Four: Alternative Binding Options 
Class Begins: May 9
4 Weeks - $25
Instructor: Jennifer Priest 


Tuesday, April 17, 2012

Online Classes from Zome of our Zisters


Spring Online Classes  
with Zutter & My Creative Classroom!
Whether you are new to the Bind-it-All, or a seasoned pro, we've got a class for you!

Jennifer Desktop Calendar  

You've either already taken the Bind-it-All 101 course or you're familiar with using the Bind-it-All. In this course, we'll take binding to the next level, creating several projects using the Bind-It-All tool and accessories, like the Round-It-All, OWires, and Cover-Alls. It's not about the basics anymore - we'll learn techniques for addressing challenging binding situations such as binding irregular shaped pages, binding on the edges of a project, binding pages of various sizes, creating projects besides books, tips for fixing mistakes, and more.

Lesson One: Binding Pages of Varying Sizes
Lesson Two: Binding On the Edge
Lesson Three: Creating Projects 
Lesson Four: Alternative Binding Options 
Class Begins: May 9
4 Weeks - $25
Instructor: Jennifer Priest 


4 weeks - $25
Updated Curriculum
 
Once you master this class you will wonder why you waited so long! This course will cover the very basics of using the Bind-it-All for punching and binding custom mini books. This information-rich, project-packed, four week course will cover:
  1. Overview of the Bind-it-All : Includes review of settings, tools, maintenance, and accessories.
  2. Punching Basics: Includes creating your own Bind-it-All Punching & Binding Guide and tips for punching centered and even holes.
  3. Binding with Confidence: Covers the use of the Owire Sizing Templates and how to bind perfect "o-shaped" owire spines.
  4. Mini Delights : Create two custom bound mini albums - one 3X4 mini and one 4X4 mini, utilizing easy techniques you can repeat again with any theme.
  5. Everyday Albums : Take your custom binding up a size or two with a 6X6 and 8X8 album. Explore different punching styles for a truly unique project!
  6. Bonus! Binding Above & Beyond: Explore how to use your Bind-it-All using every day, around-the-house materials. In this lesson we will review other punching materials and expand from the basic to the uber creative! Take these project starters and take off with creative ideas and executions of your own!
Once you master this course, you will feel confident in taking on any custom binding project. 
Quick Links...
 

Thursday, March 15, 2012

Paper Hearts...

Yes, Valentine's Day has passed but love can last the whole year! I created this mini for a private class I taught at an event for a group of sophisticated crafters who love all things elegant yet over the top--the bar was set high so this is the mini I created, full of details, trims, and more.

Really the sky is the limit with the types of items you can create as pages in your books using your Bind-It-All. Now that I have worked "behind the scenes" in the paper crafting industry I know that some of the pre-made albums and books you can purchase pre-bound, off the shelf have been in development for months if not YEARS! Imagine if you could see something hip, cool, and trendy and make a book out of it today, right now, this very moment! Well, that's why I love my Bind-It-All.

In October I attended Jennifer Jensen's class at Spark the Event and she had these square doilies in her class, folded into envelopes. I wanted them badly badly badly so I could make something from them but when I started searching online, the packs I found were just too wildly expensive. Imagine my surprise when I was in the local 99 Cent Only store, you know, the chain store with the purple logos, and there was an entire DISPLAY of square doilies!!!!! I bought them all -- teehee!

Immediately I came home, folded one of the doilies into an envelope, and punched it with my Bind It All. Here is the result:

Now, if I were to take this idea to "market" and have a company make this, you would not see it for a good 6-12 months! I just can't get over how awesome it is to be able to incorporate current trends into my books instantly.
Here are some other things I added to the book:
Coin envelopes always seem to be on clearance somewhere but the color is too yellow for alot of products. A light coating acrylic paint will tone them down before punching with the Bind-It-All.
Shipping tags are another great way to add to interest to your books!

And don't forget paper bags--this striped Valentine sack was a seasonal offering at Target. This is a great way to use up leftover party bags or just add a touch of "cute" to your books. I can guarantee no one else has a book just like mine :)

I hope this post causes you to look at flat items in your life as possible pages in mini books. And that you can have it all RIGHT NOW by using your Bind-It-All to handcraft custom books.

Happy Binding!
Jennifer Priest
http://hydrangeahippo.blogspot.com

Wednesday, February 29, 2012

20 Minutes to a Mixed Media Zutter Cover-All Mini Album

Jennifer Priest here with a super easy mini you can create in less than 20 minutes! I created a really easy mini book with various sized pages from different materials and made two videos showing you how easy it is to use your Bind-it-All to make custom books from just about anything. This book has shipping tags, kraft tags, vintage flash cards I got at a flea market, Zutter Acrylic Covers, Maya Road Kraft Envelopes, and more, all neatly packed into a 6x6 Zutter Cover-All.
Here's the first video:

And the second part:


 Here's a peek at some of the details on how I embellished the book.  You can also check my blog for more details.


Thank you for stopping by and I hope that this inspired you to think of new materials to add to your mini books! And look at how easy it was to add all those different sized pages to the book -- if you make a book like this with tags and ephemera worked in as pages in your book, please post your project to our Facebook Page so we can see it!!


Happy Binding :)
Zutter Zister Jennifer Priest
http://hydrangeahipppo.blogspot.com

Sunday, January 29, 2012

Zutter Sampler at CHA-W 2012

Join Zutter Zister Nan Paturzo and then entire Zutter team at this Workshop designed and taught by Zutter Zister Jennifer Priest:


CHA Workshop 

January 31, 2011
8:00am-10:00am
CHA Trade Show, Anaheim Convention Center, Anaheim, CA
Room: 213C

Supplies: Liquid adhesive, Scissors

Zutter's innovative tools have revolutionized the art of the scrapbook album and beyond. In this hands-on course we will create a guide book and sample using the Zutter Bind-It-All machine, Zutter Kutter, and more, as a sampling of the techniques presented in the Official Zutter Certification Program, launching at CHA - Winter 2012. The samples created in this course demonstrate techniques that can be easily passed on to your customers and used in classes.

Instructor(s): Jennifer Priest and Nana Campana
Sponsor(s): Zutter, Trim Craft, Xyron, hydrangeahippo.etsy.com

This workshop is sold out, however, we're sharing a few more photos with you to give you some ideas on ways you can incorporate unique elements into your own handmade books using the Zutter Bind-It-All:
Mix our Acrylic Tab Folders with Paper Hardware Bags between paper and chipboard pages.
Glassine bags make fun accents while our 3x4 Acrylic Pages are a great way to add a focal point between pages. Embellish with ribbon, sitckers, or bling for an easy accent piece.

And finally, adding in our Movable Page Protectors between pages, as well as using office supplies such as Shipping Tags, can add more room for photos in your books without the bulk of adding more chipboard.

If you're coming to CHA-W, come on by our booth to see more inspiring samples using our innovative line of tools and accessories!

Zutter Zister Jennifer Priest


Tuesday, January 4, 2011

Custom Calendars with your Bind-it-All!


The Bind-it-All is perfect for creating hand made calendars and gifts. Even if the holidays have passed, you can still make a custom calendar using the Bind-it-All. Last year I shared a calendar from Little Brown Pen (now under shop name "Stating the Obvious") that I printed out and bound with my Bind-it-All. This year I purchased a printed calendar from 
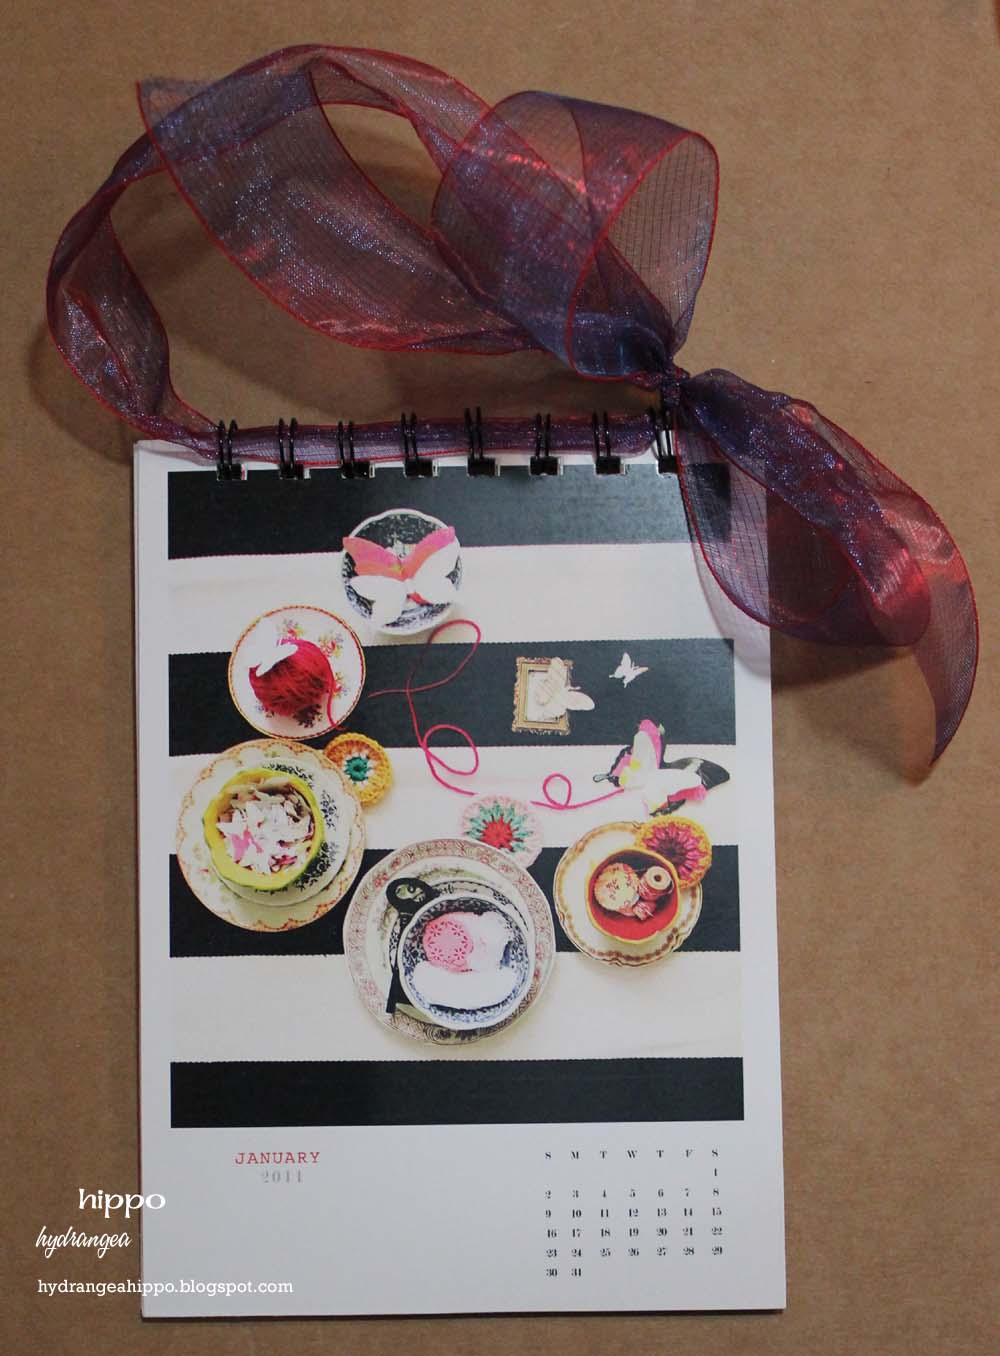
BellaDrummer on etsy that I bound with my Bind-it-All to create a wall calendar. Here's how:

Purchase a pre-printed calendar or printable calendar.
 

Measure the length of the side you wish to bind. If it measures in a half inch increment (5", 5.5", 6", 6.5") then you're in luck! If it does not measure in half inch increments, it will be best to center the item in the Bind-it-All to punch the holes.

Since this calendar measures 5" wide, I will set the Bind-it-All to the "C" Setting. This will ensure that there is a half inch between the edge of the calendar and where the row of holes begins. This is for a professional look and it also keeps the ends of the O-Wires covered by the pages so that they don't snag anything or anyone :)
Since the pages are more than 4" wide the holes won't extend all the way across the pages.  To punch the remaining holes, move the Bind-it-All to the "A" Setting "Open" and slide the pages over to the right (if you are looking at the word Zutter on the front of the machine) until the left edge of the pages is flush with the left edge of the Bind-it-All machine.


On the back of the stop guide that you've been moving to set the machine to "C" and "A" there is a black peg that is the same shape and size of the hole the Bind-it-All punches. Insert that peg into the nearest punched hole. This will ensure even spacing of the new holes you are going to punch.


You can punch all of the pages at one time if you like, just like I did above. Once all the holes in each page are  punched, put the pages in order. Now set the page for December on top. This will ensure that the seam where the O-Wires meet is between the back cover and last page of the book for a professional look and functional book/calendar. If the seam of the O-Wires is in the front of the book, it can interfere with turning the pages and looks unprofessional.


Once you've flipped the back cover (December) to the front, insert the O-Wires from the back of the calendar (from the November side).  This will ensure that none of the pages slip through the seam of the O-Wires. I used 3/8" O -Wires. 


Set the Bind-it-All to the 3/8" O-Wire setting.

 
A fast way to "measure" O-Wires is to insert the whole long strand of O-Wire through the holes then use wire cutters to trim off the excess. You can also count the holes and then count one loop of wire per hole and cut the length of wire that way. 
 
Now close the O-Wires in the Bind-it-All. Flip December back to the back of the calendar. To create the hanger, I used a 1 yard piece of fancy ribbon. You can also use a Zutter "D" and Hang-It-All too.
 
Thread the ribbon through the O-Wires with tweezers. The tie to the ends into a bow, leaving enough slack to create a hanger.
The ribbon for the hanger should also have enough slack that you can turn the pages of the calendar through it to get to the next month.
Hang and enjoy!
Etsy is a great place to purchase printable calendars (print yourself from a digital file the seller emails you) or printed calendars. Here are a few I like:

Here are the two calendars from Tina K. Photography that I bound to use as stocking stuffers: 


The Bind-it-All isn't just for scrapping! Happy Binding :)

OZZ DT Member Jennifer Priest