Showing posts with label layers. Show all posts

Friday, July 6, 2012

Double Binding Tutorial

Hello everyone!!! We have a super easy
tutorial for all of you today but with 
fantastic results.
It is called double binding.

All you need is your project that
you intend to bind, two sizes of Owire,
and your Bind-It-All tool.

First we will want to take the
smaller size of Owire first and bind it.

Like so.

Now we will simply take
our larger size of Owire and
overlap then bind.

Again like so and we
are done!!!
Easy right!

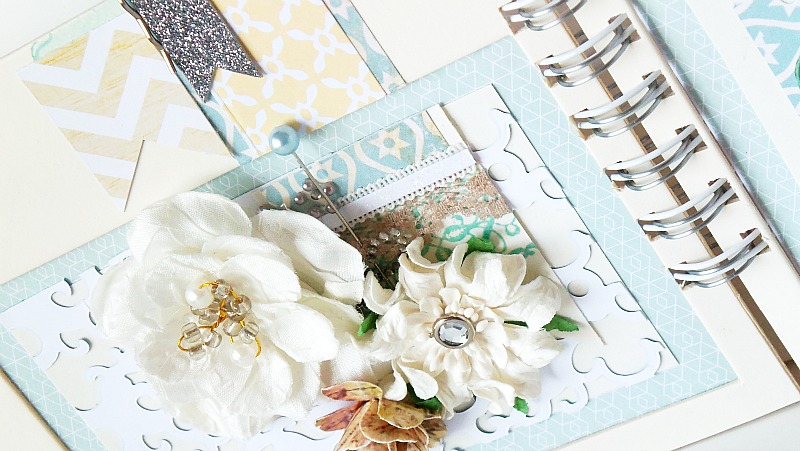
Here is my complete project in details
Pretty Little Things.

NOTE: The range of how your project pages turning
is determined by the smaller size of Owire. 
For example, I used 1/2" Owire for Pretty Little Things
Project. It is very limited to turning which is what I wanted for
this particular project.
The project below I used 3/4" Pink Owire
which allows for page turning.
The smaller the inside Owire the smaller
range of turn.
The larger the inside Owire
the larger the range of turning
your pages becomes.


I do hope that we all enjoyed this
little quick technique and will use it.
It is quite cool for giving a little more
depth to projects.
Thanks so much for allowing me to share!


4. American Crafts Paper/Trim
5. Echo Park Paper
6.KI Lace Paper
7. Recollection Glitter Cardstock
8. Prima Flowers
9. Hydrangea Hippo Lace/Trim
10. Hydrangea Hippo Blue Stick Pins
11. Crate Paper Sticker Elements


Saturday, June 9, 2012

Animal Crackers Pocket Album Tutorial

How are we all doing today! I hope all
is well especially now that summer is
in full gear.
Today we will be putting together a pocket
album which is super easy and fun!
With a few simple supplies this
album turns out stunning.
Let's begin!!!

Select a few sheets of 12x12 paper which
will in turn be your pockets.
Evenly measure out 4 inches across which
will render 3 strips that will create pockets. It is totally up to you
how many pockets you want in
your album.


Take one of your strips and score/fold about
6 1/2 in mark horizontally.

Measure about 1/2" in on both sides
vertically also scoring/folding at marks.

It looks like so:

At the horizontal folds cut both corners
in an angle like so (see photo). This will make it
easier to fold the sides in clean and neat.

Apply glue to the insides of the 6 1/2 in. sides
and adhere down.

To the other sides, apply glue to the
outside of the sides, fold in half, and adhere
to the other end.

It will look like this!
Easy, right!?

Now gather the rest of the strips and 
repeat the same steps.


If you desire, a half hole can be cut out
of the shorter end of pocket to
create a notched look.
Make sure that it is cut out first
before adhering. 

After all the pockets are dry break out
your Bind-it-All and start punching away.

After assembly, you will have your
very own pocket album to
embellish to your heart's content.
The pockets also serve as extra places for
pictures, notes, etc.!!!
Here is what I did with mine:
                                        I love the end result. Now this album is ready for some
                                                                     great memories.


                                                   Hope that you enjoyed this post and please share your
                                                   pocket album. We would love to see it!!!


Supplies:
  • Bind-It-All V2.0
  • Pink 3/4" Owire
  • Sassafras
  • Basic Grey
  • Echo Park
  • American Crafts
  • Cosmo Cricket
  • Momenta
  • Lily Bee                                        


                                                              truedivinehand.blogspot.com
.

Saturday, May 19, 2012

Because You Are Mom


Hi there again! It is Candice Elliott
back with another Zutter Bind-It-All
project for us all. I hope that
everyone had lovely Mothers Day.
Mine was spent with my husband's
family and it was just wonderful
time.

Since I was not able to see my
mother this year I wanted to
make something really special
for her. She had been asking for
pictures of us for a while now.
I wanted to find a way of
showcasing a number of pictures
to her while at the same time
share a few thoughts with her.
I put together a Frame Album and
that is what we are going to be
looking at today! 


To create this I simply created a very mini
album using the Clip Board Covers 3x4"
and 1/2" Silver Owire. I adhered the album
to the frame after putting on the Prima paper.

I used lots and lots of layers! Some of
these layers serve a purpose. When opening the
album some of the flowers hold the pages
in place while when shutting the album
does the same. Also if you take a look a
close look at the frayed flowers I used
the scraps from punching to create those flowers.
The little pieces also reminded me of
confetti. Nothing goes to waste with me!


All that I strive to be has a huge part
to do with my mother. The doctors told her
that if she tried having me that either she
would die, I would die, or the both of
us would die. She was in the doctors
office papers signed and all to have me
aborted but could not go through with
it. Well, as you can see they were
wrong. She did not give up. I am so
grateful for that moment in time.


The title mother definitely does not come easy
so I wanted to let her know that I know now!


Finally I wanted let my mother know that
she is a rare rose. The only one of
her kind and that she is loved more
than I can say. I LOVE YOU MOM!!!
Thank you all once again for
allowing me to share!

Supplies:
Other Products includes:
  • Prima papers, flowers, and letters
  • Websters Pages Elements
  • Sassafras Sticker Elements
  • Making Memories Phrase Stickers
  • Echo Park Element and Letter Stickers
  • Cosmo Cricket Element Stickers
  • My Little Shoebox Element Stickers
                                                            http://truedivinehand.blogspot.com/