Showing posts with label owire. Show all posts

Sunday, August 26, 2012

Junior memories book

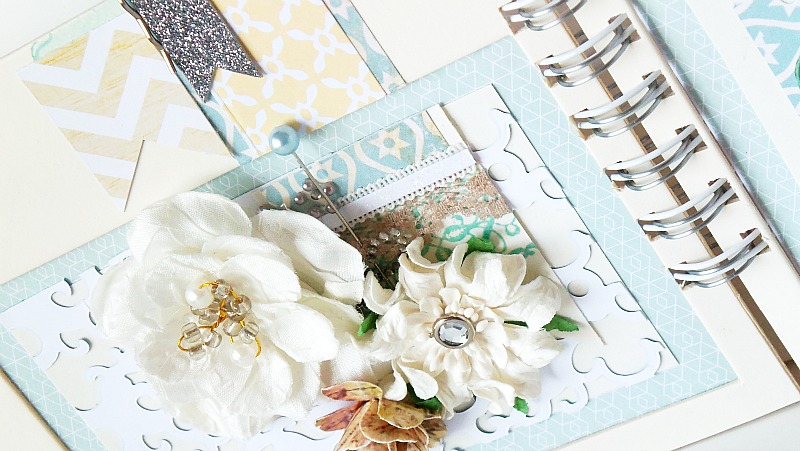
Hello all. Nicole here. Where has the time gone? I can't believe it, but my baby sister is starting her Junior year of high school this month. Yikes. I feel so old. Last month while I was visiting my mom and sisters, Katie asked me if I ever made blank mini albums (which I never do), but I told her I could make here a few. In fact, I was really happy that she asked because the thing I love the most about scrapbooking is that I can make beautiful things for other people that are one of a kind. This month I had so much fun using some goodies from the Hydrangea Hippo Esty shop. Have you seen this shop? There are so many adorable trinkets, trims, jewels and so much more in this shop. You must check it out. This mini was a challenge for me since I am not used to creating minis without pictures but I think I did ok. And I think Katie's gonna love it :)


Supplies:
Zutter: 8X8 Cover-Alls in White
Zutter: Owire in Pink
Zutter: 4X6 Movable Pre-Punched Page Protectors
Other:
American Crafts, Echo Park, G.C.D Studios: Papers
Zva Creative: Jewels
May Arts: Trims
Tags, Flowers, Buttons, Trinkets, Leaves, Stickpin: Hydrangea Hippo Esty shop

Thursday, August 2, 2012

Feeling chipper?

Hello everyone. Nicole here. And today, I would like to share a fun tutorial on how you can use those chipboard pieces that you have lying around in your stash. I've had quite a few piece of chipboard that's been on my shelf for months until just recently, I though of a cool idea which involved using them and the fabulous Bind-it-All to create a fun, textured mini album.


First I covered each piece of chipboard with patterned paper (front and back).
Then I used the Bind-it-All to bind my mini together.
And here are a few pages from my album.
Supplies:
  • Bind-It-All: Zutter
  • Owires: Zutter
Other:
  •  Glitz Design: Happy Travels Papers
  • Glitz Design: Happy Travels Rhinestones
  • Glitz Design: Sticker Alphas in brown.
  • Glitz Design: Happy Travels Transparency
  • Heart punches: Creative Memories
  • Acrylic Butterfly stamp: Technique Tuesday
  • Ribbon: Prima

Monday, July 30, 2012

Happy together

Hello! I hope all is well with you! Today I am just going to share a quick and easy mini album that I created for my sister. A few months ago, I came across some post about her relationship with her boyfriend and thought it was so touching so I wanted to create something that she will always have to remember these precious times. I hope she found her soulmate because it's not easy to find that special person you want to be with for the rest of your life and she is SO happy with Scott and I am truly happy for her.
Supplies:
  • Zutter: Bind-it-All
  • Zutter: Owires in Antique Brass
  • Other:
  • Creative Memories: Cardstock
  • Webster's Pages: Papers
  • Webster's Pages: Trims
  • Webster's Pages: Jewels
  • Webster's Pages: Acrylic heart
  • Wesbter's Pages: Flower
  • Creative Memories: Heart Punch

Saturday, July 21, 2012

Bind a Holiday - and a Technique

Hi everyone!  Nancy here today to share with you a fun mini album I made with a super cute kit I picked up from the Hydrangea Hippo etsy store.  My family is heading off to Hawaii soon and I wanted to make a cute mini album to showcase a few of the photos I have yet to take.  LOL
I love these papers from Trinity Paper Arts and think they are just perfect for this project, especially after a quick trip through my Distrezz-it-All to get the lovely worn edges.
I love making small albums to showcase a few special photos, and my Bind-it-All is makes it quick and easy to get to the fun part (for me anyway), embellishing.


I really love the added opportunities working with o-wires brings to my minis.  For this book, not only did I attach lots of buttons, beads, ribbons and other baubles to the o-wires; but I changed the color of the white o-wires to match the project.

This was a simple process involving a few alcohol markers (Bic Mark-its) that coordinated with my papers...
and my o-wires.  I simply colored the o-wires with the markers and then allowed the wire time to dry before binding.
Here you can see a close up of my fully embellished o-wires.
Thanks for stopping by today.

Hugs.

Nancy Keslin

Thursday, July 19, 2012

A Day Out


Hi there everyone! Are we all hyped up
on CHA?!!!
Are we all excited about Zutter's
cool new product?!!!!
I just bet we are!


Well, I for one can't wait to get
my crafty little fingers
on some that's for sure.
Until then we can still play
and come up with some great
creative ideas.
I call this one
A Day Out.
This project was actually inspired
by a day out. It was a day
that I got a chance to meet Jennifer Priest
for the first time and 
made some goodies with the
Bind-It-All 2.0!
I only had a chance to create the
base of this project
but brought it back home
to finish it up.
I couldn't let this project just sit.


Just a few little sweet accents
that reminds me of the fresh
outdoors. 
I wish I had a bike just
like this one. 
Wheels and all!
It sure was a beautiful day
that day and I really wanted
this project to reflect that.
Maybe we all can
get outside, breathe the fresh air,
take in a few sun rays,
and get inspired together!
Thank you for letting me share!


             2. 3/4 Antique Brass Owire
          3. 3/4 Clip-board Covers
                          4. Hydrangea Hippo Sew Sweet Kit
                        5. Studio Calico Blue Grass Mister
                         6. Clearsnap Candle Glow Smooch
               7. Hydrangea Hippo Buttons
          8. Elle's Studio Pink Tags
9. Bo Bunny Paper


                                                              truedivinehand

Friday, July 6, 2012

Double Binding Tutorial

Hello everyone!!! We have a super easy
tutorial for all of you today but with 
fantastic results.
It is called double binding.

All you need is your project that
you intend to bind, two sizes of Owire,
and your Bind-It-All tool.

First we will want to take the
smaller size of Owire first and bind it.

Like so.

Now we will simply take
our larger size of Owire and
overlap then bind.

Again like so and we
are done!!!
Easy right!

Here is my complete project in details
Pretty Little Things.

NOTE: The range of how your project pages turning
is determined by the smaller size of Owire. 
For example, I used 1/2" Owire for Pretty Little Things
Project. It is very limited to turning which is what I wanted for
this particular project.
The project below I used 3/4" Pink Owire
which allows for page turning.
The smaller the inside Owire the smaller
range of turn.
The larger the inside Owire
the larger the range of turning
your pages becomes.


I do hope that we all enjoyed this
little quick technique and will use it.
It is quite cool for giving a little more
depth to projects.
Thanks so much for allowing me to share!


4. American Crafts Paper/Trim
5. Echo Park Paper
6.KI Lace Paper
7. Recollection Glitter Cardstock
8. Prima Flowers
9. Hydrangea Hippo Lace/Trim
10. Hydrangea Hippo Blue Stick Pins
11. Crate Paper Sticker Elements