Showing posts with label Candice Elliott. Show all posts

Thursday, September 20, 2012

Keep Forward


Hello Zutter world!
Today we are going to take a little
look at my Keep Forward album.

Big Picture just had a festival
Big Ideas Festival in which there
were a series of in depth challenges
for us to search a little deeper into
what we do.
For this particular challenge it
was to set up a layout or page
of that one goal or dream
we are working on.
I decided to set  up an album
to place my goals in but it doesn't 
stop there.
We actually have to move on them
meaning whether it be something small
or big each day just take a step or
two towards that goal.
I have quite a few but there are
key goals that take priority over all.
This album will be dedicated to
those.

           
There are a number of hard cover pages
and Zutter inserts so that I will
have plenty of space to document
my step-by-step process.
This particular album will be
put to good use for sure.
Hopefully we all will continue to
challenge ourselves to dig a little
deeper in our craft and 
continue to grow in it.
Thank you as always for letting me share!


5. Pink Paislee Digital Kit Happy Now
6. Bella Blvd. Stickers Sophisticates 
7. Echo Park This and That Stickers
8. Prima Stamps
9. Elle's Studio Tags
10. K&Company Smash Marker


Sunday, August 19, 2012

In The City


Greeting to all today!
I take it that school is now in
session for everyone.
I just finished myself registering
and can't wait to get started.
With a little bit more extra time
for us crafters I am sure
we are making good use of
it with some extra creating.

Here is an album I created
titled In The City. Hubby
and I spend quite some time
out and about on the
bus to different places.
It is interesting to capture those
unplanned moments on
the move. This album
was born for such memories.
Enjoy!


Downtown

Santa Monica

Checking bus schedule

So much to see,
so much to snap!
Thanks so much for stopping by
and letting me share! It is
always a pleasure


.
3. SEI Mulberry Kit
4. Prima Say-It-With-Crystals
5. Momenta Travel Dimensional Stickers
6. DCWV School Paper Pack


Sunday, August 5, 2012

Build A Key Chain with Bind-It-All


Welcome back to yet another
quick idea tutorial!
Today we are going to be 
building a key chain made
from O-Wire Scraps.
If anyone knew me as of
right now I waste nothing when
it comes to crafting in which
I find it hard to toss those
single O-Wire scraps out.
The shape of them alone reminded
me of a key chain loop and
I thought BINGO!!!
I will make a key chain.
Here we go!

There are no set supplies really
for this project except
for your O-Wire and
Bind-It-All. These are
some of the supplies that I used.
Feel totally free to make this
project your very own.

I cut my pieces out ahead of 
time and went ahead and gave
them some embellishment.

Here we see the front and 
back of this key chain.
Make sure to adhere tap on
first and punch whole.

We now have back and front
adhered.

Now we are going to place
key chain element in zip lock bag.
We are going to stitch this element
inside. I hand stitched but if you
have a sewing machine that
is just so much better. You don't 
have to use zip lock bag. It
can be anything translucent that
can be sewn through.

After stitching all around we
are now going to use our
Bind-It-All to put the O-Wire
loop on. Make sure it is looped to
where the seam of O-Wire is on the back.

Here we have finished product!!!
I made the one for my daughter
ahead of time to show that you
can add as many as you want.
My personal key chain is going
to include family. Just key moments
in which I want to look back on.
Again, please make this your
own and let your imagination run
with it.

Here are a few more detail pictures.

Well, I quite enjoyed this even
though it gave me a few
challenges in the beginning. LOL!
It was very well worth it.
Please if you give this project a
whirl share with us. We
love to see what you all
create. 
Thank you for stopping by!!!


5. Webster's Pages Note Card
6. Elle's Studio Tag
7. Momenta Family Matters Stickers
8. K& Company Arrow Stickers
9. Misc. Tag
10. Zip Lock Bag
11. Needle N Thread


                                              truedivinehand

Thursday, July 19, 2012

A Day Out


Hi there everyone! Are we all hyped up
on CHA?!!!
Are we all excited about Zutter's
cool new product?!!!!
I just bet we are!


Well, I for one can't wait to get
my crafty little fingers
on some that's for sure.
Until then we can still play
and come up with some great
creative ideas.
I call this one
A Day Out.
This project was actually inspired
by a day out. It was a day
that I got a chance to meet Jennifer Priest
for the first time and 
made some goodies with the
Bind-It-All 2.0!
I only had a chance to create the
base of this project
but brought it back home
to finish it up.
I couldn't let this project just sit.


Just a few little sweet accents
that reminds me of the fresh
outdoors. 
I wish I had a bike just
like this one. 
Wheels and all!
It sure was a beautiful day
that day and I really wanted
this project to reflect that.
Maybe we all can
get outside, breathe the fresh air,
take in a few sun rays,
and get inspired together!
Thank you for letting me share!


             2. 3/4 Antique Brass Owire
          3. 3/4 Clip-board Covers
                          4. Hydrangea Hippo Sew Sweet Kit
                        5. Studio Calico Blue Grass Mister
                         6. Clearsnap Candle Glow Smooch
               7. Hydrangea Hippo Buttons
          8. Elle's Studio Pink Tags
9. Bo Bunny Paper


                                                              truedivinehand

Friday, July 6, 2012

Double Binding Tutorial

Hello everyone!!! We have a super easy
tutorial for all of you today but with 
fantastic results.
It is called double binding.

All you need is your project that
you intend to bind, two sizes of Owire,
and your Bind-It-All tool.

First we will want to take the
smaller size of Owire first and bind it.

Like so.

Now we will simply take
our larger size of Owire and
overlap then bind.

Again like so and we
are done!!!
Easy right!

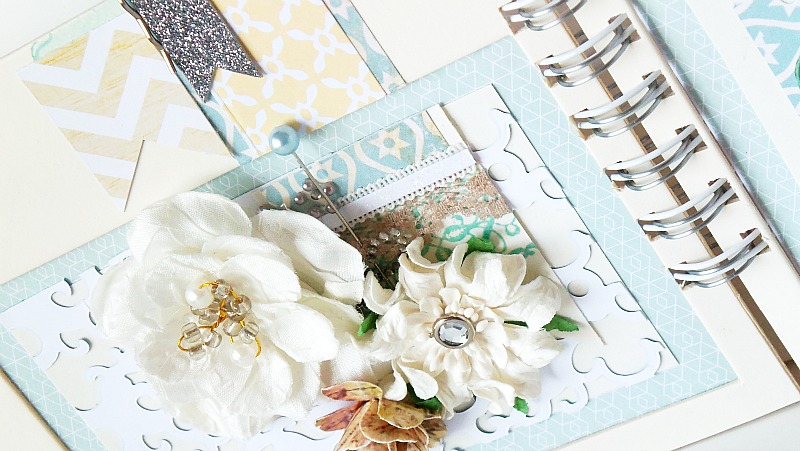
Here is my complete project in details
Pretty Little Things.

NOTE: The range of how your project pages turning
is determined by the smaller size of Owire. 
For example, I used 1/2" Owire for Pretty Little Things
Project. It is very limited to turning which is what I wanted for
this particular project.
The project below I used 3/4" Pink Owire
which allows for page turning.
The smaller the inside Owire the smaller
range of turn.
The larger the inside Owire
the larger the range of turning
your pages becomes.


I do hope that we all enjoyed this
little quick technique and will use it.
It is quite cool for giving a little more
depth to projects.
Thanks so much for allowing me to share!


4. American Crafts Paper/Trim
5. Echo Park Paper
6.KI Lace Paper
7. Recollection Glitter Cardstock
8. Prima Flowers
9. Hydrangea Hippo Lace/Trim
10. Hydrangea Hippo Blue Stick Pins
11. Crate Paper Sticker Elements