Showing posts with label design team member. Show all posts

Saturday, July 28, 2012

A Mixed Up Summer Journal

It's Amy here today, to share a recent book I made for myself. I have recently become very dependent on Google calendar on my iPhone to organize myself and my family, but I often need a place to quickly write a note, stick a business card or brochure, sketch out an inspirational idea, or tuck tickets from a movie or event. I was sort of needing a Smash book, but something more along the lines of a smash book meets journal, meets spiral notebook. I decided the only way to have this strange book, to my own to suit my needs and style, was to craft one myself. 
 
To embellish the inside covers, I simply took two pieces of super cheap stationery, ($1.25 for 150 sheets), cut them to fit the inside of the book covers,  and distressed them with the distrezz-it-all. Then I decoupaged them to the book, and gave the white area of the paper a coat of gesso, before misting them with black mist, and some drips from the cap.


I started with an old library book discard for my book's cover. The covers of this book were sturdy, but very vintage, and it was easy to tear the binding apart, and use just the outside covers. I decided I would have pages of differing sizes and textures inside, so I punched the holes with my bind-it-all on the top and bottom only. In retrospect, I would have punched all along the side, to simplify the process....but I do like the look of the separate sets of o wires.


I used my bind-it-all to punch and bind all kinds of interesting and quirky objects, like this 45 record I cut in half (the other half is on the book cover). The bind-it-all is amazing, and can just bite into nearly anything! I covered the cut ends in washi tape, and it kept the edges from potentially chipping and splintering during the punching process.
 

 I wrapped stamp packaging with washi tape (if anything needed edges, it was washi taped!) , and threw those in the mix of pages that also include library card pockets, a restaurant beer coaster, and legal sized envelopes. It always inspires me to have a mix of ideas, even in something somewhat utilitarian. Since this book will accompany me pretty much everywhere, I definitely wanted it to be inspiring! (Even if it's a little quirky and strange at the same time).

Another soft cover to a book was a fun addition, but it felt a little thin, so I added washi (again) to the edges. 


I had an old spiral notebook with some blank pages left, so I tore them out, and bound them, as well. Zutter chipboard helped me out with some stability, so I put gesso on one side of four pieces, and put October Afternoon travel themed papers on the other side. The other blank papers are more of the stationery, and it is simply folded in half and bound. There are plenty for me to use to journal/make notes on.


My summer has been quite mixed-up, and definitely hasn't been what I planned. But now, I have a fun and inspiring journal to tote with me during the last "dog days" before school starts. 
I hope maybe you will give creating a "mixed up" book a try.....it's so easy! Just grab your great Zutter tools, some random things you love, and in just a little bit of time, you'll have something special to use for ideas and inspiration, too! Thank you so much for joining me today! 


Tuesday, June 26, 2012

Oh So Sweet, Cupcake Recipe Display

           Hello Friends! Heather here to share a super fun and quick project that makes a great gift for the baker in your family. Using the Display-it-All I created a Cupcake Recipe book for my sister in law who makes the most amazing cupcakes (especially the Resse's with peanut butter frosting, yum!!) I whipped this project up in under two hours and I am super excited to share the details with you all today.

First, start off by spray painting the pieces of the Display-it-All, two coats of white spray paint covered it nicely. While your stand is drying, cut out your chipboard, paper, and recipe cards. I was able to find a pack of 25 recipe cards at my local craft store for $1.99, and used those as a template to size my chipboard and paper. I used my Round-it-All to round all of the corners to give the book a softer look. Punch your holes and bind with 3/4" Pink O-Wire and attatch to your Display-it-All stand.

Now you can start the fun part, decorating the cover and inner pages! I used a few simple images from my Silhouette SD to add some kitchen themed die cuts and tabs, tied some coordinating ribbon to the O-Wire, and I have a one of a kind recipe book. Hope I have inspired you to create your own sweet recipe book today.

Best,
Heather 
Front Cover of the Recipe Book. I used 2 cupcake liners to make an
easy and cute flower on the front.
I added lots of recipe cards and also a few blanks pages to add pictures.
                                    The rolling pin and tabs were cut using my Silhouette


Zutter Products Used:

Other Products:
*Pink and Blue Cardstock
*Cupcake Paper, The Paper Studio
*Recipe Cards, The Paper Studio
*Cupcake liners
*Satin White Spray Paint
*Ribbon
*Silhouette SD Macine for die cuts

Monday, June 18, 2012

Love Letters and 10 Years

Hello friends, Heather here with a fun project I am so excited to share with you using a set of 5x7 acrylic covers  for a special keepsake book I created in celebration of 10 years of marriage with my handsome hubby. I have to start by saying I absolutely love using acrylic in my books. I will add an acrylic cover or page in whenever I can because I love the extra weight it gives and there is something fun about the translucence of the acrylic.


In honor of my anniversary, I was inspired to take a trip down memory lane, finding old pictures and notes that we have written over the years. I realized that I had yet to make a book that documented just our relationship and this was the perfect opportunity. I wanted to keep this book simple, yet still have the personal touches I love, like hidden pockets for love notes, and extra tags to journal on. Hope you enjoy my mini and the step by step instructions so that you can make one of your own.

Start out by punching 8 holes in the acrylic covers. Leave the
 protective film on the covers until you have finished punching to protect
from scratches or cracking.


Continue to punch 8 holes on all of the interior pages
Use 3/4" Black O-Wire to bind the book. Since the book is 1/2" thick
and I added the additional tags and pockets, 3/4" O-Wire is a great
size to allow the pages to turn freely.

Here is the front cover, a picture from our wedding on top
(yes, I am the one smashing cake on him while he was being very sweet,
I could have sworn he was going to do it!)
and a more recent picture underneath. The pictures are attatched on
the 1st page, and I added a die cut and bling to the acryclic

A flashback picture from my Homecoming Dance when
I was a junior in high school
Another fun pocket inside of the paper bag to add notes and old pictures


Supplies:

Best,
Heather

          http://www.whimzeecreations.blogspot.com/


Thursday, June 7, 2012

My Favorite Recipes

Hi everyone, Nancy Keslin here today to share with you a project I made using my Zutter Bind-it-All, some cute Melissa Frances supplies and my Zutter Display-it-All.


I was so thrilled when I ran across this cute little kit at the Scrapbook Expo, covers and insert pages for a fun, kitschy, recipe album.  I knew it would match my kitchen and with a little help from my Bind-it-All I made a simple book to hold some of my families favorite recipes.
White 1-inch O-wires hold my little book together.  And bits of lace, trim, sequins, (from the Hydrangea Hippo store) and a few Prima flowers, as well as a bit of stickles, complete the covers that I rounded with my Zutter Round-it-All.
I painted my Display-it-All with an off white crackle finish so that it would coordinate with my kitchen, adding more flowers and a cute little doll tea pot I had from my daughter's younger days to embellish the base.
I really love how the Display-it-All keeps my recipes within easy eye site and up off my prep surface.
Now all I need to do is get in there and cook.

Thanks for stopping by the Bind-it-All blog today and be sure and come back soon.

Zutter Items Used:


Other Items Used:
  • Melissa Frances Kitschy Kitchen Recipe Cards
  • Sequins, Trims, Flowers Hydrangea Hippo Etsy
  • Prima Flowers, leaves
  • Folk Art Crackle Medium, Acrylic Paint
  • Pleasant Company Teapot


Hugs.

Nancy


Sunday, May 13, 2012

Hello, Amy!

It's Amy here today with my first post as a Zutter Zister! I feel incredibly blessed to be a part of this amazing team, where the original Zutter Zisters set the bar for fantastic and innovative album design. I have deeply admired what Zutter has to offer for so long, and been so inspired by the ways the design team has showcased such fun and exciting products! So, needless to say, I'm thrilled to be showing you a few of my projects featuring these products, and to let you know a little about me.


 grungeboard, tissue tape, button, Tim Holtz; Tag, KI Memories; Twine, Pink Paislee; gaffer tape, 7 Gypsies; paper flower, paper, Creative Memories; 
border punch, purple ribbon, Martha Stewart; corrugated alphas, Jillibean Soup; canvas fabric, brown ribbon, vintage


I thought I'd kick things off with one of my favorite album covers, for a travel journal; because besides being a mom to 3 lovely, creative girls, and the wife to my best friend from college, I'm a courageous soul, who loves to explore the world, even if it is just where I am at that very moment. I try not to be limited by fear, and to try to use each of the talents I may have to the fullest. One day, I hope to travel the world, and see the sights in such places as India, Peru, Thailand, South America......the whole globe! Of course, the best part will be scrapping all of those memories!


Stickers, Authentique; journaling tags, papers, Jenni Bowlin; paint, Liquitex; mist, Tattered Angels; ribbon, Martha Stewart, vintage; 
metal elements, Tim Holtz; handle,  upcycled


Since I started scrapbooking and crafting a few years ago, one of the main things that really keeps my creative motor running, is thinking of fun ways to showcase my memories. I love how the bind-it-all makes it easy to take a fun, different idea, and make it a reality! Like this "haunted house" album I made showcasing the photos from our annual family "Halloweenie Roast" at my mom and dad's farm. It was fun to figure out how to make the album open up like the doors of a haunted house, by binding them on each side, to one large piece of Zutter corrugated board in the back. The album doors open wide to a panorama of photos of the event! (The handle to the door, is a old cabinet pull I found in the drawer in my garage!)


Oh, and as a quick aside, if you see the books that are fitting for this album (spooky Agatha Christie mysteries) on the side of the album, and maybe the shelves of books behind, you'll see this was photographed at my place of work....a library! I am the director of a small public library (with perfect evening light for photographing projects after work), as my main source of employment, as well as being a church soloist and section leader. I am a trained operatic soprano....who obviously took a bit of a detour. Hehe.


papers, Jenni Bowlin; paper flowers, paper circle, Creative Memories; stamp, Graphic 45;
 flowers, Webster's Pages, Prima; Dymo labeler; Alphas, Jenni Bowlin, Doodlebug; paint, Liquitex, Mist, Tattered Angels
twine, rickrack, fabric, buttons, library card, vintage.
 You'll see that these last two projects are created using Zutter's 13x13 corrugated board.  I have a slight obsession with this corrugated board, for any project! I love the texture and dimension it provides, and how it absorbs paint and mist. I use Zutter's corrugated board so much, that I have developed a special painting technique for the cardboard, that I will be so excited to share with you all very soon!
Stamps, fabric and plastic flowers, brads, Jenni Bowlin; paper, Fancy Pants, Jillibean Soup, vintage; 
paint, Liquitex, mist, Tattered Angels, Clearsnap


You will also find that I enjoy finding and using recycled and thrifted elements, especially in my mini books. I love to take things that have pretty or usual graphics (like the coffee bags that I turned into book pages HERE on the bind-it-all blog),and use them on my pages. It always makes me feel so bad to throw them away! (No, please don't sign me up for the next episode of Hoarders, my husband keeps me in check!)

Thank you so much for joining me today on this walk down my Zutter project memory lane.


Wednesday, May 9, 2012

A Little Whimzee and a Sweet Mother's Day Mini

Hello Friends! Heather Mendenhall here with my first 2012-2013 Zutter Zister design team post. I have been over the moon excited  at having this amazing opportunity to share my love for paper crafting and creating fabulous mini albums with my Zutter products.


My journey into the scrappy world started when I had my daughter Hailey and realized that I wanted her to have more than a simple baby book that was half filled out; I wanted her to have beautiful albums that she would one day share with her own children. For many years it was a hobby, getting together for coffee and scrapping with the moms at preschool, until I started realizing that I wanted a challenge, to make unique albums that no one else had.


This past year I started to really put myself out in the crafting world and have been selling at craft fairs, launching my Etsy shop and blog, and attending conferences to grow my business and let others enjoy my paper crafting creations. I enjoy displaying my art and meeting other crafters and customers who are as excited as I am to take home an album, as I was to create it. I have always believed that handmade items are the most amazing gifts to give and receive, and I feel truly honored to be a part of the community of crafters and artists who live in this handmade world with me.

Today I am going to share a darling mini album that I made as a special order for Mother’s Day. I hope you enjoy and I look forward to creating with you this next year!


Best,
Heather


Supplies:
Posted by Heather Mendenhall

Sunday, May 6, 2012

A Little Kindness Goes A Long Way.......

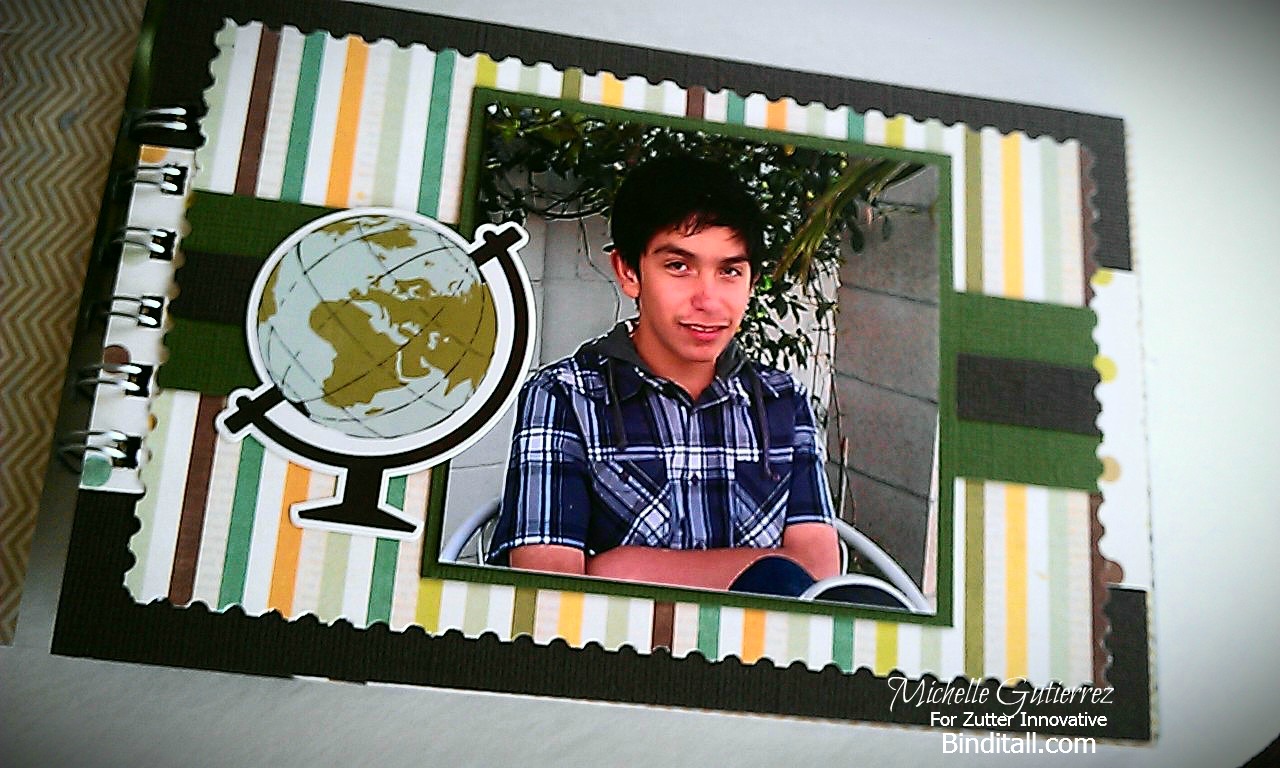
Happy Sunday everyone! This is Michelle Gutiererez here for Zutter Innovative with my 1st blog post. I am so excited to share this acrylic album I made! 

This handsome young man is one of the kindest well mannered kid I know. No matter what he does, it is always with a "please" and "thank you". Teaching us all the a little kindness goes a long way....... a simply amazing kid, my Vincent is.


I cannot tell you how much I love my Zutter Bind It All V2 tool. It all starts with a vision, my Bind-It-All, 7.5"x 5" clear acrylic album  and all the fixings to create an awesome mini album. 


I used 1/2"  Silver O-Wires to bind the acrylic album together. 


Use the Centering Arrow in the middle of the holes printed on the Bind-It-All (above "T" in "Zutter") to center the book  to place the binding in the center of the acrylic album pages.   Continue with each page int he album and arrange the pages in order. Flip the back cover of the book towards the front and insert the O-Wires from the back pages of the book, through the covers. Then use the Bind-It-All to close the O-Wires. Be sure to use the plastic O-Wire templates included with your Bind-It-All to set the machine for the proper size of O-Wire before closing.

How awesome is it that you can create an album what ever size you want using the Bind-It-All!

Here are all of the pages of the assembled album:


Supplies Used:
  • Album - Clear Acrylic 7.5"x5" Zutter Innovative
  • 1/2" Silver Wire - Zutter Innovative
  • Paper - This and That by Echo Park
  • Element Stickers - This and That by Echo Park
  • Rhinestones - Kaisercraft
  • Ribbon - Maya Road
  • Alpha Stickers - Authentique Paper 
  • Adhesive - Tombow Mono
Tools Used:
  • Bind It All V2.0
  • EK Success Stamp Punch


Always,
♥ Michelle