Showing posts with label Mini Albums. Show all posts

Monday, August 27, 2012

A Sweet Baby Book, Start to finish

Jennifer Priest here with a quick little video showing how to make a mini book from start to finish using one of the kits in my etsy shop. 


This video features the Sweet Baby Girl Mini Book Kit from start to finish. This same tutorial can be used for the Sweet Baby Boy Kit or you can substitute your own paper and create a book with any theme. I hope you enjoy this -- it goes pretty quick!


Posted by Jennifer Priest

Sunday, May 6, 2012

A Little Kindness Goes A Long Way.......

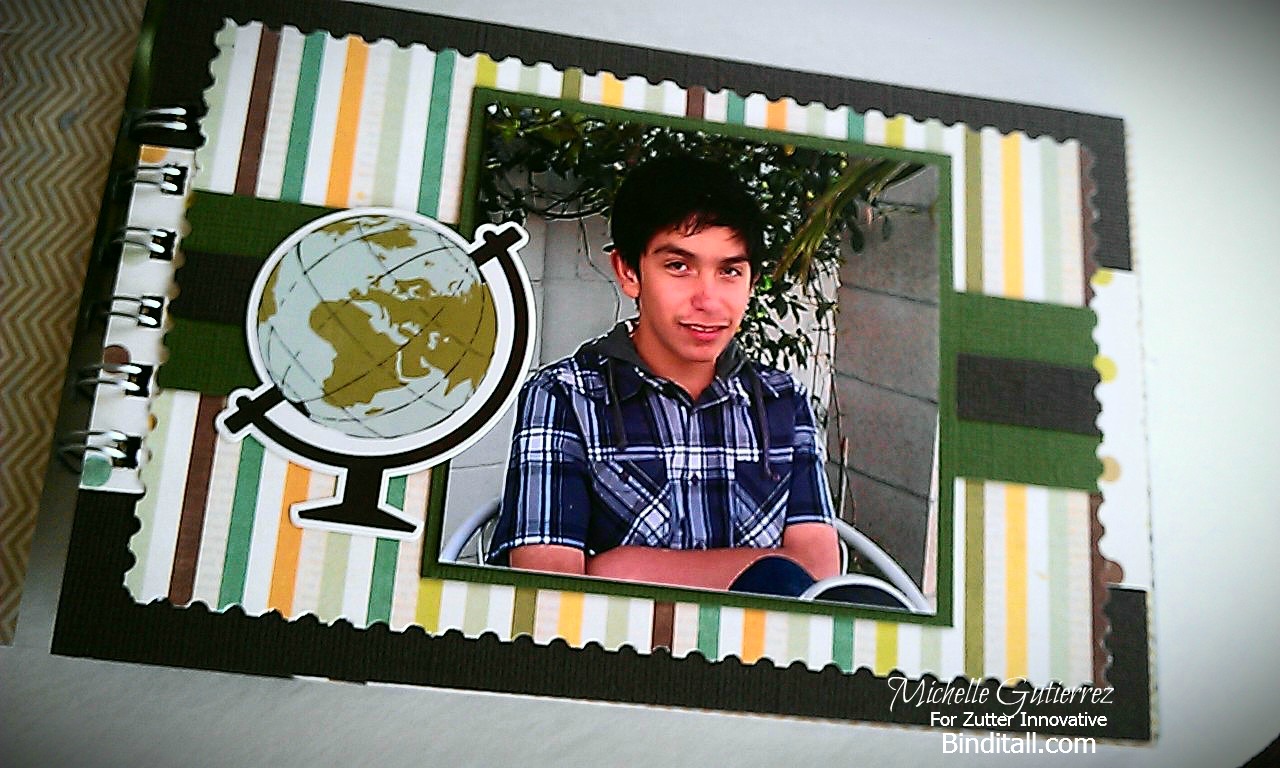
Happy Sunday everyone! This is Michelle Gutiererez here for Zutter Innovative with my 1st blog post. I am so excited to share this acrylic album I made! 

This handsome young man is one of the kindest well mannered kid I know. No matter what he does, it is always with a "please" and "thank you". Teaching us all the a little kindness goes a long way....... a simply amazing kid, my Vincent is.


I cannot tell you how much I love my Zutter Bind It All V2 tool. It all starts with a vision, my Bind-It-All, 7.5"x 5" clear acrylic album  and all the fixings to create an awesome mini album. 


I used 1/2"  Silver O-Wires to bind the acrylic album together. 


Use the Centering Arrow in the middle of the holes printed on the Bind-It-All (above "T" in "Zutter") to center the book  to place the binding in the center of the acrylic album pages.   Continue with each page int he album and arrange the pages in order. Flip the back cover of the book towards the front and insert the O-Wires from the back pages of the book, through the covers. Then use the Bind-It-All to close the O-Wires. Be sure to use the plastic O-Wire templates included with your Bind-It-All to set the machine for the proper size of O-Wire before closing.

How awesome is it that you can create an album what ever size you want using the Bind-It-All!

Here are all of the pages of the assembled album:


Supplies Used:
  • Album - Clear Acrylic 7.5"x5" Zutter Innovative
  • 1/2" Silver Wire - Zutter Innovative
  • Paper - This and That by Echo Park
  • Element Stickers - This and That by Echo Park
  • Rhinestones - Kaisercraft
  • Ribbon - Maya Road
  • Alpha Stickers - Authentique Paper 
  • Adhesive - Tombow Mono
Tools Used:
  • Bind It All V2.0
  • EK Success Stamp Punch


Always,
♥ Michelle

Thursday, May 3, 2012

MemorieZ down Zutter Lane


Hello Zutter fans.  Cheryl Boglioli here with my first post as an official Zutter Zister.  I have been a fan of Zutter for many years and am so excited that they have brought back Zutter inZpiration with a new DeZign Team.  I’m even more excited that I am one of those chosen to be a part of this.  This next year to going to be amaZing; I know that by the amount of talent that compriZes this team and am humbled and honored to be just a small part of it.  
I’ve been crafting and scrapbooking for many years.  However, I finally took the plunge and became a full-time designer and educator within the last year.   It was through encouragement and support from family, friends, and fellow designers that gave me the courage to take this major step. 

My family has been a huge support in this endeavor and I am truly thankful for them everyday.  I have a supportive husband who also competes in North American Strongman Association competitions, so you’ll see pictures of these events occasionally.   I also have a gorgeous (if I say so myself) daughter who plans to go to school next year for Professional Makeup Artistry and special effects.   She will be graduating from Indian River State College this weekend with her AA degree and then will be turning 19 in 3 weeks, so to say I’m super proud of her is an understatement. 

I truly love my Zutter tools and the freedom they give me to create so many wonderful home and office projects, mini albums, and gifts.  I thought I’d share with you some highlights from my Zutter projects over the years.


Mini albums created in 2010 using my DreamKuts and Bind-It-All.


Another Mini Album using my Bind-It-All.


Distrezzed journal using Bind-it-all and Distrezz-it-all


I do also know how to sew, so I created a little dust cover for my Bind-It-All


and one for my DreamKuts


and one for my Zutter Kutter.  


I use my Zutter Kutter when prepping for class workshops or when working with heavier materials.  I am so thankful to have this power tool in my arsenal. 


Here are a few ladies that are learning to use the Distrezz-It-All in one of the workshops I recently taught.  They definitely had a great time and loved this. 


I love how the DreamKuts kuts the prep time down on cutting paper.


I used The DreamKuts, Distrezz-it-all, and Bind-it-all to create this fun summer album. 
So there you go.  I definitely use my Zutter tools and cannot wait to start making even more projects to share with you as well as being inZpired by the rest of this amaZing team.   Are you really using your Zutter tools?  If not, let us know what is holding you back.  I am confident that by becoming a Zutter Fan and keeping an eye on our blog and Facebook page, you will be inZpired to start using your Zutter tools more too.  
Thanks for stopping by and we’ll see you soon.