Showing posts with label Prima. Show all posts

Friday, August 17, 2012

Tea Party

Hi everyone, Nancy here today to share with you a mini album to go with the teacup mobile I made a couple of weeks ago.  (If you missed that project you can see it here.)  Once again, I used my Cricut to cut the chipboard and my cardstock; and used my trusty Bind-it-All to bring it all together.  I love that about my Bind-it-All...I can cut just about any shape and turn it into a mini album.  I chose to use one inch, white o-wires to hold this little book, which measures about 5 inches across the top, together.
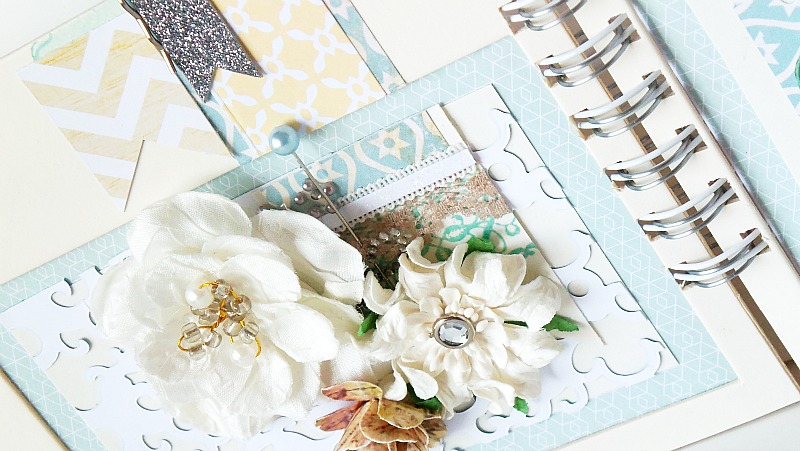
I filled the mini album with lots of yummy papers and chipboard from the Daily Junque collection from Pink Paislee and a few odds and ends from my scrap table including Prima flowers, lace and trims; as well as some Basic Grey Canvas, a couple of older Autumn Leaves buttons, and a resin piece from Melissa Francess that I colored with some alcohol markers.


Here is a close up of the front cover which also has a large pink flower from the Hydrangea Hippo store. 
I was hoping to use this little mini for an upcoming party my daughter is hosting.  But she really wanted to use it now, so we filled it with photos from her third birthday party.  

Thanks for stopping by.

Hugs.

InLinkz.com
Zutter Items Used
Bind it All
White O-Wires
Chipboard

Non Zutter Items:
Patterned Paper & Chipboard: Pink Paislee
Flowers:  Large Pink Hydrangea Hippo
Other Flowers: Prima Marketing
Resin: Melissa Francess
Laces: Prima Marketing
Cording: Crate Paper
Alphabet Stickers: Making Memories
Buttons: Autumn Leaves
Stick Pin: Prima Marketing
Alcohol Markers:  Bic Markits
Jewels: Prima
Teapot charm: Unknown
Canvas tags: Basic Grey

Nancy

Friday, July 6, 2012

Double Binding Tutorial

Hello everyone!!! We have a super easy
tutorial for all of you today but with 
fantastic results.
It is called double binding.

All you need is your project that
you intend to bind, two sizes of Owire,
and your Bind-It-All tool.

First we will want to take the
smaller size of Owire first and bind it.

Like so.

Now we will simply take
our larger size of Owire and
overlap then bind.

Again like so and we
are done!!!
Easy right!

Here is my complete project in details
Pretty Little Things.

NOTE: The range of how your project pages turning
is determined by the smaller size of Owire. 
For example, I used 1/2" Owire for Pretty Little Things
Project. It is very limited to turning which is what I wanted for
this particular project.
The project below I used 3/4" Pink Owire
which allows for page turning.
The smaller the inside Owire the smaller
range of turn.
The larger the inside Owire
the larger the range of turning
your pages becomes.


I do hope that we all enjoyed this
little quick technique and will use it.
It is quite cool for giving a little more
depth to projects.
Thanks so much for allowing me to share!


4. American Crafts Paper/Trim
5. Echo Park Paper
6.KI Lace Paper
7. Recollection Glitter Cardstock
8. Prima Flowers
9. Hydrangea Hippo Lace/Trim
10. Hydrangea Hippo Blue Stick Pins
11. Crate Paper Sticker Elements


Thursday, June 21, 2012

Coffee Sleeves and Instagram

Hi everyone!  Nancy here today to share with you a project I made using some coffee sleeves and my favorite binding tool, the Bind-it-All.


I love using my phone to take photos and have taken bunches of shots using Instagram.  This small format was perfect for these low resolution photos.
I really put my Distrezz-it-All to work to create the shabby chic look I was after. Placing the papers over the coffee sleeves. And then binding with 1 inch Antique Brass O-Wires.
I used lots of different trims and flowers from the Hydrangea Hippo store to coordinate with my Prima Marketing papers.
The size of this album was just perfect for using up some scraps I had lying around from previous projects.
So, have you ever used the Distrezz-it-All?


Hugs.


Nancy


Thursday, June 7, 2012

My Favorite Recipes

Hi everyone, Nancy Keslin here today to share with you a project I made using my Zutter Bind-it-All, some cute Melissa Frances supplies and my Zutter Display-it-All.


I was so thrilled when I ran across this cute little kit at the Scrapbook Expo, covers and insert pages for a fun, kitschy, recipe album.  I knew it would match my kitchen and with a little help from my Bind-it-All I made a simple book to hold some of my families favorite recipes.
White 1-inch O-wires hold my little book together.  And bits of lace, trim, sequins, (from the Hydrangea Hippo store) and a few Prima flowers, as well as a bit of stickles, complete the covers that I rounded with my Zutter Round-it-All.
I painted my Display-it-All with an off white crackle finish so that it would coordinate with my kitchen, adding more flowers and a cute little doll tea pot I had from my daughter's younger days to embellish the base.
I really love how the Display-it-All keeps my recipes within easy eye site and up off my prep surface.
Now all I need to do is get in there and cook.

Thanks for stopping by the Bind-it-All blog today and be sure and come back soon.

Zutter Items Used:


Other Items Used:
  • Melissa Frances Kitschy Kitchen Recipe Cards
  • Sequins, Trims, Flowers Hydrangea Hippo Etsy
  • Prima Flowers, leaves
  • Folk Art Crackle Medium, Acrylic Paint
  • Pleasant Company Teapot


Hugs.

Nancy