Monday, May 31, 2010

Easy Peasy Gift for Dads, Grads, or Teachers

It's that time of year again--say "goodbye" & "thank you" to the teachers with a little gift, say "congrats" to the grad with a fun little something to start their new career, and say "we love you" to Dad. So many gifts, so little time, right?!


Well, this project is super easy (and affordable) to make and a great gift for a dad, grad, or a teacher.

Here's what you need:
Assembly:
  1. Adhere the Crafty Chronicle newspaper (or map paper) to the 8x10 Clipboard wood and sand edges until smooth.
  2. Mat photo to paper and add to top of 8x10 Clipboard Wood.
  3. Adhere the cork board and the Post-Its to the bottom of the Wood as pictured, slightly to the left.
  4. Stick one side of the Velcro to the pen and the other piece to the Wood, on the right hand side.
  5. Punch a hole in each top corner of the Wood with the Rivet Setting Tools. Tie twine through the holes to make a hanger.
  6. Ink the edges of the project.
  7. Write a message to the recipient on the Post-It note. Add push-pins to cork.
  8. Add "Family" word or sticker to the photo (on the bottom left side).
  9. Wrap & give ;)
You can really do this for co-workers, admin assistant's day, teachers...it's really easy to customize to any theme ;)

Enjoy!

OZZ DT Member Jennifer Priest

Thursday, May 27, 2010

Distrezz it All....HAPPY!

I am Distrezz-it-All HAPPY!

OH MY...my favorite new go- to TOOL!!! (and I'm not saying that because I'm on the DT) I was soooo excited to get my hands on one of these and BOY how much fun it is. My daughter even commented the other day as to how much I use it!! ALOT to say the least!!

So of course, I had to include a Distrezzed project for my Zutter Zister DT project this month.

I Distrezzed cardboard, chipboard, watercolor paper, pattern paper, cardstock, I have even Distrezzed photos (not pictured)! I just love the look you get! You can Distrezz a little or alot depending on the direction you put your item through the machine.
  

Another feature I just love is the ability to Distrezz more than one piece of paper at a time....what a time saver. I could have never achieved this look with my little distress tool or a pair of scissors.

Now, I will tell you, it is a bit loud but due to the swiftness in which it Distrezzes....the sound is very short lived and as far as I'm concerned....really not a problem!!

Look at that chowder edge....don't you just love it!! A look that I only could have achieved with my DISTREZZ IT ALL!!
Zutter Zister DT Member Lynne Forsythe

Monday, May 24, 2010

Greeting Card Holder - BIA Style

Hi there! Though e-cards are so easy to send these days, I say nothing beats receiving a card in the mail, and better still, one that is handmade! It's truly sending a love letter! So for me, I have cards made for various occasions, ready for me to send my love to my family and friends for a myriad of reasons or simply just because. In this post, it's not going to be about creating a card, but rather, creating a Card Holder to house all those lovelies so that I can reach for them in a jiffy and know exactly for what occasion each one celebrates/remembers.
For this project, all I used were Covers (4 x4") and ClipBoard Wood (8x10"), owires 1/2" and my trusty BIA. Because of the size of the cards I usually create, what I did was to trim my ClipBoard Wood to 4x10" to ensure that this holder will fit most cards. To do so, I used my paper trimmer and went over the board a few times. Trust me, this process will be much easier when the Zutter Kutter is used, which of course I'm waiting to land my hands on.

After attaching patterned paper to the covers using Mod Podge, I ran my boards through the BIA, including both lengths of my ClipBoard Wood. For the 4x4" covers, you only need to punch holes on three sides of the covers.

Once all that is done, owires were used to bind the covers together. While you might like to weave ribbons through the holes instead, I like the idea of using wires here as it allows my card collection to expand and the holder is able to stretch a little, given the extra space found in the rings of the owires. Nonetheless, both options make for an excellent card holder!

Now on to embellishing the almost completed project. Remember that the Clipboard Wood covers were punched on both lengths. This was done to allow me to tie ribbons through them at the top. I like how those cream ribbons lend a romantic feel to this project. Each ribbon was threaded through two holes. I also added alpha stickers and blooms to the front of this project.

Finally, in order to organize my cards, I used Clear Acrylic Folder Tabs as dividers and labeled each using my Dymo tape labeler. This way, I know exactly which part of the holder to look into, without having to over handle any of my creations.
I hope you have fun too creating a personalized card holder, one that will help you make the process of sending love in the mail all the more sweeter!

Zutter Zister DT Member Sophie Sim

Saturday, May 22, 2010

Magnetic Paper Doll Mini Album

I had so much fun making this mini album!!


When I saw the new line of paper from Crate that had the dolls I knew it would make a great mini album but I wanted to do something a little different so I made the album magnetic. It was really easy to do. For the inside pages I glued a magnetic sheet to one of the Zutter Chipboard Covers and turned the back side of that into a pocket to hold the magnetic characters and other items.


I made three different scenes for the paper dolls, a bedroom, a backyard and a party room. I then glued the paper dolls to another sheet of magnetic paper and cut them out. I also made furniture, cupcakes, purses and other items with the paper.


You can also play with the dolls and accessories on the fridge. Try it out and have fun playing like a kid again!


Zutter Zister DT Member Fleur Smith

Tuesday, May 18, 2010

We Got you Covered! 15% OFF Right Now!

Wowie! We need some room in the warehouse!  We have a first time EVER sale on Zutter Covers and Inner Pages.  15% Off Site-Wide for a limited time only.

Stock on up on Zutter Acrylic, Clipboard Wood, Canvas Artboard and good ole trusty Chipboard.  We also have pre-cut cardstock Inner Pages ready to go for quick album making.   


Sale is limited to stock on hand, and subject to end at any time.  Discount price is automatic in your shopping cart and regular shipping rates apply.  Shop now and stock up for summer crafting and albums!  Shop now HERE.

Monday, May 17, 2010

they grow up way too fast

Over and over, I hear people tell me that their children grow up way too fast. Well, isn't that what scrapbooking is all about?! Documenting stages in our lives so that we don't forget what happened?!

With that in mind, I created a mini album that helps track the growth of a newborn baby boy. This album can also be altered to accommodate the growth of a baby girl as well.


For the cover, I wrapped a Zutter Bamboo Spine Cover-All with the latest from Teresa Collins. Then, I added tons of flowers and bling to embellish my cover.


The inner pages are a compilation of monthly pages. Monthly pages?! Well, I created this mini album as a way to document the growth of a baby boy. If you want to include more photos than each page can fit, insert Zutter Moveable Pre-Punched Page Protectors.


Pretty simple, right?! Hope you enjoyed this mini album as much as I did.

Hugs,
sarah

Zutter Products:
Zutter Tools Used: Wire Cutters
Zutter Products Used: Owires
Covers: Bamboo Spine Cover-All

Other Materials:
Patterned Paper: Teresa Collins
Chipboard: American Crafts
Stickers: Making Memories
Flowers: Prima
Bling: Want2Scrap, Queen & Company

Zutter Zister DT Member Sarah de Guzman

Thursday, May 13, 2010

Create a special book for someone using items from your stash!

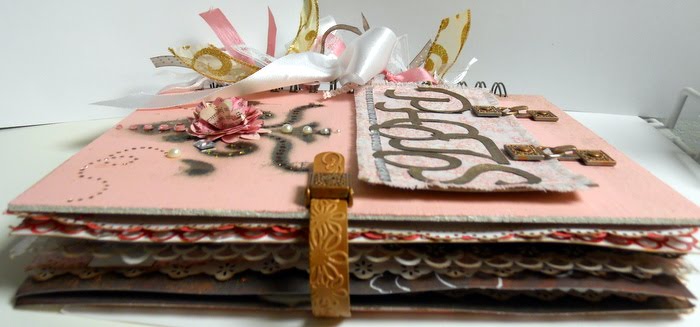
One of my favorite ways to create a mini or in this case a biggie, is by using items in my stash. I have to admit, I LOVE collecting things, but sometimes I actually dig into my stash and create something with the items I have just been collecting or admiring. :)


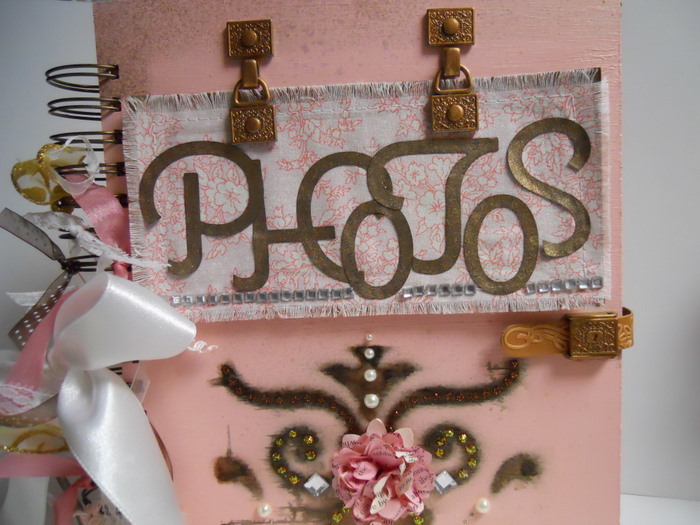
I made this book by using the larger size Zutter clipboard wood covers - 8 x 10. I love this size, because it gives me so much space to embellish it, as well as it makes a terrific gift. I call this size book a BIGGIE instead of a mini, since the covers are close to a standard size piece of computer paper. It is also loaded with pages, 26 to be exact! That is a lot of space for pictures or journaling.


I had a blast using a variety of Zutter products in addition to my Pink BIA ranging from the fun new Hang-It-Alls to the Clip Board Wood Covers I painted, misted, smudged, and inked to lots of rivets, to the Perfect Closures. I stamped and embossed the leather strap, and used some of my alcohol inks to change the closure from gold to copper. Easy peasy, and it has a custom look now! I did the same thing with the Hang-It-Alls, I added some alcohol ink to change the color from silver to copper.


I love the fact that my BIA gives me the option to take things out of my stash and turn them into a unique and one of a kind gift. No book will ever look just like this one. I love using tools, I feel they really stretch your scrapping dollars further, and help you be more creative. I also used a variety of other tools (like border punches) and lots of ink, color mists, Stickles, and gesso to help tie everything together. Most of the flowers and embellies were those I made myself, using bits and pieces from my scrap paper collection, old books, tissue paper, wool and fabric scraps and tools. Of course I did add lots of sparklie rhinestones, I couldn't make a shabby chic project without a lot of sparkle. ;) I used the negatives from my punches too, I love to do that. It is a great two-fer, you get lovely things you punch, then you also have fab negatives to use too! In this pic you can see that I dressed up my negative by using my lovely Pink BIA to also punch some binding holes -


It is like having a film strip of flowers! I also like making flowers using the fab Zutter Rivets. Here is a pic of one that I made, and I used some copper color alcohol ink to change the color of the rivet from gold to copper -


Here are a few other pages of this biggie book (it really, really sparkles irl because I used boatloads of glittery mists, wish you could see it!) -


Lastly, here is a pic of the last page and the inside of the back cover -


So go grab your Bind-It-All, some Owire, Covers, and raid your stash. You have lots of fun projects just waiting to be created!

Happy creating ~ Pam

Zutter Zister DT Member Pam Sandy