Showing posts with label Pam Sandy. Show all posts

Monday, October 11, 2010

Feeling Fall-ish and Want To Create Something Pretty Darn Quick?

I have been working like a mad woman on wedding projects for my daughter's wedding.  I had some extra bits of fall foilage stuff hanging around, so I decided to do something un-weddingish and make a fall wall hanging for my dining room. 

I grabbed one of the 8 x 10 Canvas Art Boards  (I still have one left since they come in sets of two, how great is that???) and punched 6 holes in the center top using my pink Bind-It-All.  Then I misted and embellished away.  I used the Distrezz-It-All to make quick work of distressing the edges of the kraft cardstock I used.  That Distrezz-It-All is GREAT!  You can distrezz as much or as lightly as you want and it is done in a jiffy.  I used a bit of the Antique Brass Owires  to top off the hanging, and threaded some lovely velvet corduroy ribbon through it.  This whole project took well under 30 minutes.  I love quick projects, especially when I really don't have time to create.  I find it is easier for me to squeeze in a wee bit of creative time when I create fast and fun things.  Since it is wedding central at my house right now, I definitely need fast and fun!  ;)

Here is a bit more of a close up ~

Grab some Canvas Art Board and create your own wall hanging!
Happy creating!  ~ Pam

Zutter Zister DT Member Pam Sandy

Tuesday, July 13, 2010

Want to take just a few pieces of patterned paper......?

......some white cardstock, covers, and end up with four 6 x 6 albums?

I recently received some beautiful Lily Bee Design partterned papers from the Lovely Collection and fell in love with it. I wanted to stretch it into four different mini albums. Do you have some double sided patterned paper that you have been hoarding or admiring that you would like to stretch into several mini books?


Well, here is how you can do it! First, grab four 6 x 6 Cover-Alls (or you could use 6 x 6 Acrylic or Clipboard Covers or Chipboard Covers instead), then cut all your pattened paper pieces into 6 x 6 sections. I had 6 pieces of patterned paper to begin, so I ended up with 24 pieces after I did this. Next, pick some coordinating mist spray and spray some white cardstock (I did about 8 - 10 sheets of white CS). I used a few pieces of chipboard and some die cut flowers for masks. Just lay them on your cardstock and spray away. I used several colors together and made different combos too (spray both sides). I added Stickles for a bit more glimmer. Here are a few examples ~


After your sprayed cardstock is dry (I am impatient, so I used my heat gun to speed up the process), cut it into 6 x 6 pieces. Next ink all edges of your patterned paper and your sprayed CS with ink. Keep one each of the different patterned paper and several different sprayed CS 6 x 6 pieces and set aside. I took decorative edge scissors (feel free to use border punches too) and cut strips of each piece, varying th ewidth of each piece. I then took my Diztresser and used it to lightly diztress all edges of the 6 x 6 pieces of paper. You should have piles of pages that look like this ~


Next you can start layering the decorative edged strips you cut onto your pages, and stitch, stamp, use rub ons, felt, tags, or add bling accents on your pages. Don't forget to use your Bind-It-All to punch the binding slots on one side of each page when you are happy with it. I also like to use my BIA to punch a few decorative holes on an additional side of a few pages, then thread a bit of sparkly gold tulle through the slots. It adds a bit of glitter and hint of color really quickly and easily, for little cost. Finally, bind your book together, and embellish your covers. I used things out of my stash to complement the beautiful Lily Bee items I was working with. I love mixing different products from my stash with favorite products. Don't forget to use your Zutter Heavy Duty Round-It-All to add interest to your project! It easily cuts through chipboard and quite a few layers of paper.

Here are some pictures of inside pages to give you some ideas for your own project (notice the Diztressed edges, LOVE playing with my Distrezzer!!!) ~


So go ahead and cut up that favorite Patterned Paper! You can easily create 4 projects that will bring happiness to others as well as yourself. Happy creating! ~ Pam

Zutter Zister DT Member Pam Sandy

Monday, June 28, 2010

Easy peasy, fast and fun! With a Cover-All!

Hi there!!! Are you a busy scrapper, but in need of a cute and quick little project for a gift? I have just the thing for you!!! A darling little wallet picture holder that not only comes together super fast but can be adapted for any style!  The Zutter 3X4 Cover-All is the key to all the easy-peasy-ness (is that a word?)


For my project, all I used is one piece of white cardstock, a few colors of spray mist, a Curved Spine 3 x 4 Cover-All, (or any style Cover-All), a bit of Gesso or white paint, 2 jeweled brads, bits of ribbon, and a few scraps or letter stickers.

First, spray your white cardstock lightly with a spray mist. Let dry (or if you are impatient like I am, use your heat gun to zip it dry in a minute). Flip it over, and lightly mist the other side in a coordinating color (I used two colors of green). Let dry.

Next, cut the misted cardstock into three strips, each 4" wide.
Take each strip, one at a time and cut it into 4 equal pieces (3" wide each). You should have 12 little 3" x 4" pieces of misted CS. I chose to use my Distrezz-It-All to lightly distress each edge. Set aside.

Paint a smidge of Gesso on the front of your Cover-All. Let dry or use a heat gun to dry. Lightly spray a little glitter mist spray over the cover, let dry or heat dry. Next add a few letter stickers or cut out letters to say "A few pics" - or any title. Adhere to dry cover front.

Punch a small hole in the front cover edge for a brad and ribbon(s), repeat on the back cover. Place ribbon(s) over hole, and insert brad to hold it. Repeat for back of cover. (here is a pic of the back cover once the mini is finished and the ribbon has been tied).


Next, punch holes on one side of each 3 x 4" piece of misted CS using your Bind-It-All. Grab the insert out of the Cover-All and do the same. Bind your pages and plastic with your BIA, and slip the plastic insert into the holder inside the Cover-All.


TA DAAAAAH! Your itsy bitsy mini is done! Look at those lovely lightly distressed edges of my misted cardstock!


This project can be whipped together in well under 30 minutes. You can also use a piece of a favorite patterned paper to shave off even more time! If you don't have an itty-bitty Cover-All, this project can be easily adapted to larger sizes - Cover-Alls come is a variety of sizes including 6X6 and 8X8 - using additional cardstock.

Happy creating and gifting!

Zutter Zister DT Member Pam Sandy

Thursday, May 13, 2010

Create a special book for someone using items from your stash!

One of my favorite ways to create a mini or in this case a biggie, is by using items in my stash. I have to admit, I LOVE collecting things, but sometimes I actually dig into my stash and create something with the items I have just been collecting or admiring. :)


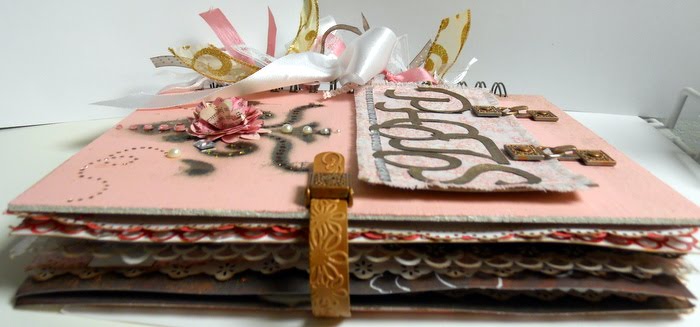
I made this book by using the larger size Zutter clipboard wood covers - 8 x 10. I love this size, because it gives me so much space to embellish it, as well as it makes a terrific gift. I call this size book a BIGGIE instead of a mini, since the covers are close to a standard size piece of computer paper. It is also loaded with pages, 26 to be exact! That is a lot of space for pictures or journaling.


I had a blast using a variety of Zutter products in addition to my Pink BIA ranging from the fun new
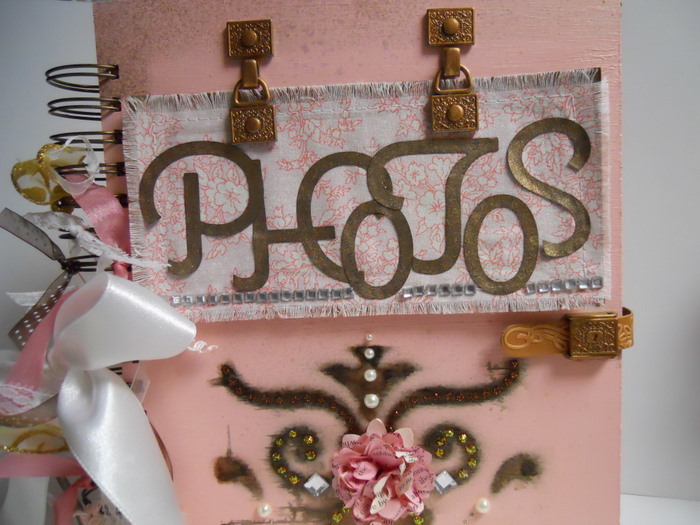
 Hang-It-Alls to the Clip Board Wood Covers I painted, misted, smudged, and inked to lots of rivets, to the Perfect Closures. I stamped and embossed the leather strap, and used some of my alcohol inks to change the closure from gold to copper. Easy peasy, and it has a custom look now! I did the same thing with the Hang-It-Alls, I added some alcohol ink to change the color from silver to copper.


I love the fact that my 
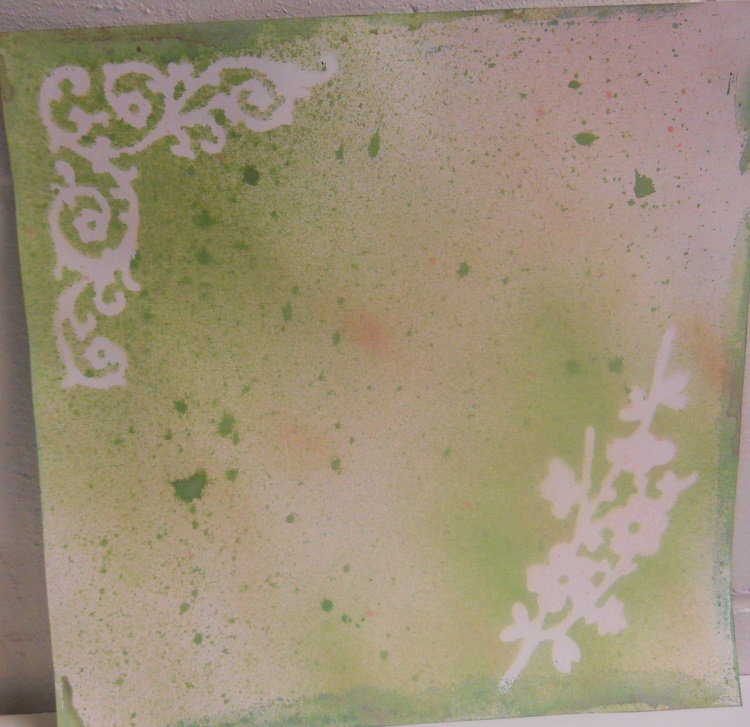
BIA gives me the option to take things out of my stash and turn them into a unique and one of a kind gift. No book will ever look just like this one. I love using tools, I feel they really stretch your scrapping dollars further, and help you be more creative. I also used a variety of other tools (like border punches) and lots of ink, color mists, Stickles, and gesso to help tie everything together. Most of the flowers and embellies were those I made myself, using bits and pieces from my scrap paper collection, old books, tissue paper, wool and fabric scraps and tools. Of course I did add lots of sparklie rhinestones, I couldn't make a shabby chic project without a lot of sparkle. ;) I used the negatives from my punches too, I love to do that. It is a great two-fer, you get lovely things you punch, then you also have fab negatives to use too! In this pic you can see that I dressed up my negative by using my lovely Pink BIA to also punch some binding holes -


It is like having a film strip of flowers! I also like making flowers using the fab Zutter Rivets. Here is a pic of one that I made, and I used some copper color alcohol ink to change the color of the rivet from gold to copper -


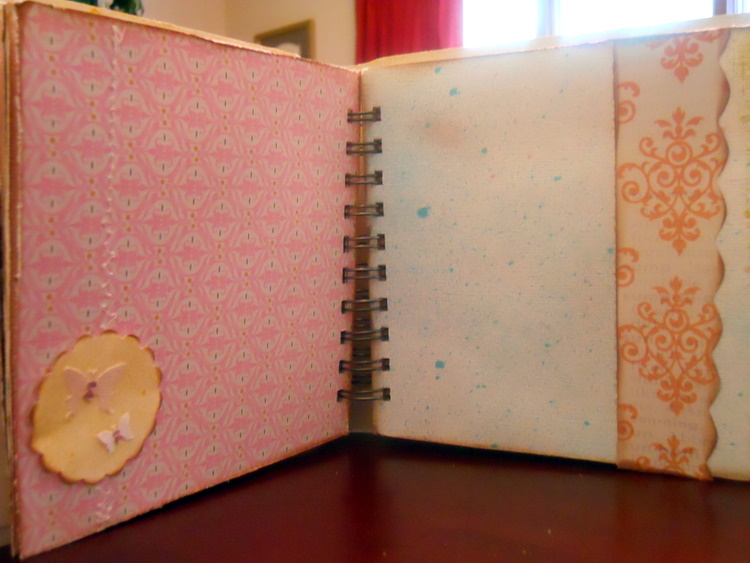
Here are a few other pages of this biggie book (it really, really sparkles irl because I used boatloads of glittery mists, wish you could see it!) -


Lastly, here is a pic of the last page and the inside of the back cover -


So go grab your Bind-It-All, some Owire, Covers, and raid your stash. You have lots of fun projects just waiting to be created!

Happy creating ~ Pam

Zutter Zister DT Member Pam Sandy