
We are pleased to share this project with you from the
Design Team from Donna Salazar Designs
featuring the Zutter Distress-it-All and Zutter Corrugated Board
------------------------------------------------------------------------
Hello lovely friends!! Natasha here to share a layout about one of the most important changes in my life... my marriage to my other half, my soulmate. We got married in January 2010, on a cold, yet special winter's day. We did not have a big wedding; we were married at City Hall accompanied by those close to our hearts. We were dressed in matching Juan Valdez sweatshirts because of the sentimental value they hold. We used to spend endless hours drinking coffee and talking at Juan Valdez Cafe in Pereira, Colombia. It is like our little haven where we shared stories and just enjoyed every moment together.

For this layout, I mostly used Donna Salazar's Theater papers from her Antiquities Collection. I love the subtle colors on these papers. I also used a sketch made by my talented friend, Michelle Grant. The photo was taken on our wedding day as we celebrated with family.

The scalloped heart and coordinating pearls are made by Want2Scrap. They manufacture Nestaboard and Nestabling that coordinate with Spellbinders' Nestabilities dies. Check out their site to see some of the gorgeous bling they offer!

I love the texture that hemp cord adds to a layout. And of course, I couldn't forget my beloved eyelets!

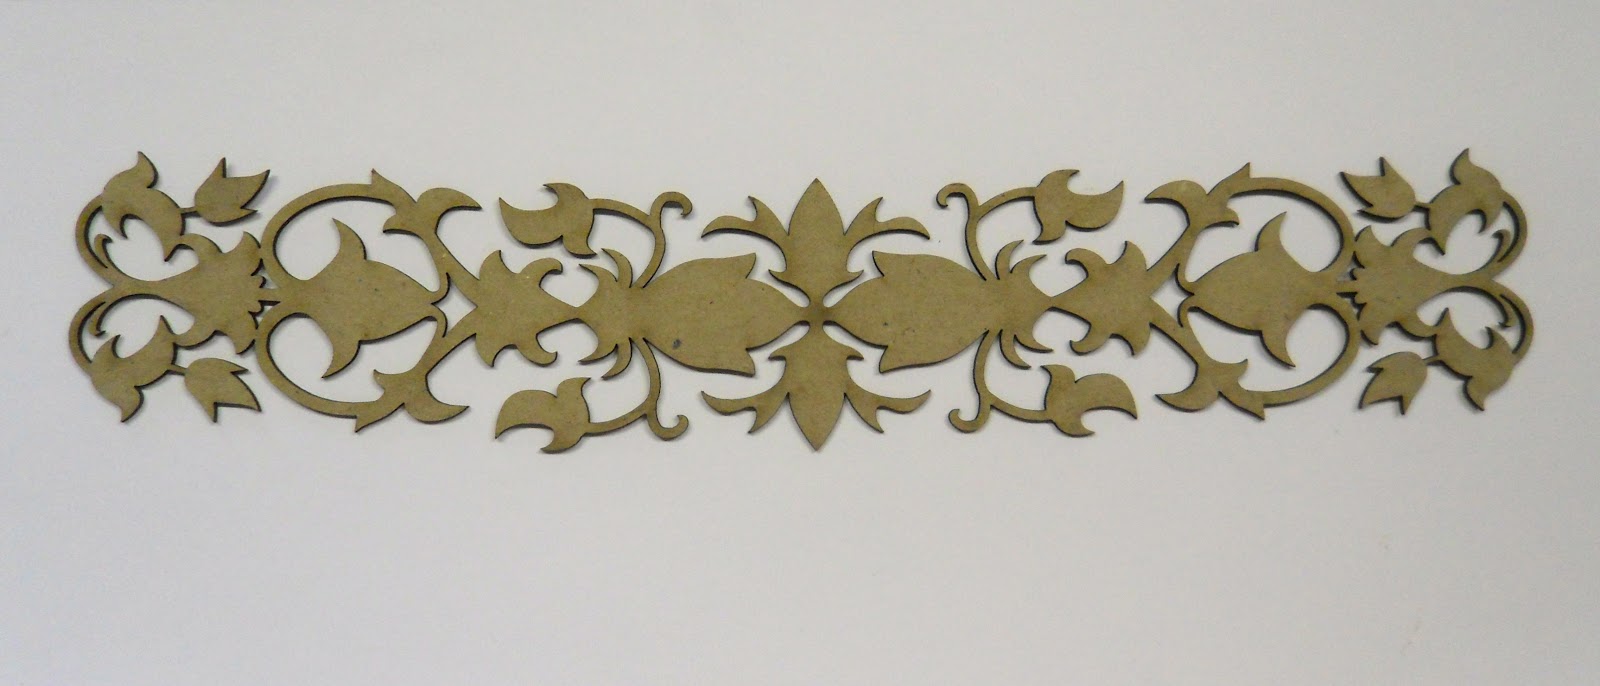
This gorgeous ornate corner is manufactured by The Dusty Attic. It's nearly impossible for me to create something without some Dusty Attic chipboard. These pieces add such beautiful dimension and elegance to any project.

I created my layout on Zutter corrugated board that was painted white and misted with Smooch Spritz in grape, cashmere and mixed berries. The edges were distressed with a Zutter Distrezz-it-All.

Behind the heart is a die-cut made from Donna's Shadow Flowers die. These dies make perfect accents for any layout. The tag behind the photo was cut using her new dies, Creative Book Pages Two.

I titled my layout 'A New Beginning' because my relationship with my husband marked a beautiful change in my life. Before I met him, I had a difficult life. I was unhappy with myself and I struggled to take care of two children on my own. My husband has been the source of great changes in my life, and I am who I am today because of him.
Below is a quick tutorial on how I added texture to the chipboard element behind my title.
Supplies Needed:
- Chipboard Element
- Smooch Spritz
- Embossing Powder (I used white.)
- Embossing Ink
- Heat Tool
- Texture Stamp
- Ink Pad

STEP 1: Add a little color and shimmer to the chipboard element by spritzing on some Smooch Spritz. Dry with a heat tool.

STEP 2: Apply embossing ink to a texture stamp and stamp the image/texture onto your chippie.

STEP 3: Cover the chippie with embossing powder.

STEP 4: Shake off the excess powder and melt with a heat tool.


Products Used:
- Distrezz-it-All by Donna Salazar for Zutter
- Corrugated Board by Donna Salazar for Zutter
- Antiquities Collection by Donna Salazar for GCD Studios
- Smooch Spritz by Clearsnap
- Nestabling and Nestaboard by Want2Scrap
- Shadow Flowers by Donna Salazar for Spellbinders
- Creative Book Pages Two by Donna Salazar for Spellbinders
1 comment:
Fabulous!
Post a Comment