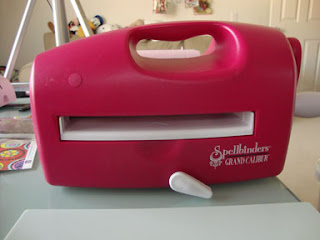
The
Bind-it-All is perfect for creating hand made calendars and gifts. Even if the holidays have passed, you can still make a custom calendar using the Bind-it-All. Last year I shared a calendar from Little Brown Pen (now under shop name "Stating the Obvious") that I printed out and bound with my Bind-it-All. This year I purchased a printed calendar from
BellaDrummer on etsy that I bound with my Bind-it-All to create a wall calendar. Here's how:
Purchase a pre-printed calendar or printable calendar.
Measure the length of the side you wish to bind. If it measures in a half inch increment (5", 5.5", 6", 6.5") then you're in luck! If it does not measure in half inch increments, it will be best to center the item in the Bind-it-All to punch the holes.
Since this calendar measures 5" wide, I will set the Bind-it-All to the "C" Setting. This will ensure that there is a half inch between the edge of the calendar and where the row of holes begins. This is for a professional look and it also keeps the ends of the O-Wires covered by the pages so that they don't snag anything or anyone :)
Since the pages are more than 4" wide the holes won't extend all the way across the pages. To punch the remaining holes, move the Bind-it-All to the "A" Setting "Open" and slide the pages over to the right (if you are looking at the word Zutter on the front of the machine) until the left edge of the pages is flush with the left edge of the Bind-it-All machine.
On the back of the stop guide that you've been moving to set the machine to "C" and "A" there is a black peg that is the same shape and size of the hole the Bind-it-All punches. Insert that peg into the nearest punched hole. This will ensure even spacing of the new holes you are going to punch.
You can punch all of the pages at one time if you like, just like I did above. Once all the holes in each page are punched, put the pages in order. Now set the page for December on top. This will ensure that the seam where the O-Wires meet is between the back cover and last page of the book for a professional look and functional book/calendar. If the seam of the O-Wires is in the front of the book, it can interfere with turning the pages and looks unprofessional.
Once you've flipped the back cover (December) to the front, insert the O-Wires from the back of the calendar (from the November side). This will ensure that none of the pages slip through the seam of the O-Wires. I used 3/8" O -Wires.
Set the Bind-it-All to the 3/8" O-Wire setting.
A fast way to "measure" O-Wires is to insert the whole long strand of O-Wire through the holes then use wire cutters to trim off the excess. You can also count the holes and then count one loop of wire per hole and cut the length of wire that way.
Now close the O-Wires in the Bind-it-All. Flip December back to the back of the calendar. To create the hanger, I used a 1 yard piece of fancy ribbon. You can also use a Zutter "D" and Hang-It-All too.
Thread the ribbon through the O-Wires with tweezers. The tie to the ends into a bow, leaving enough slack to create a hanger.
The ribbon for the hanger should also have enough slack that you can turn the pages of the calendar through it to get to the next month.
Hang and enjoy!
Etsy is a great place to purchase printable calendars (print yourself from a digital file the seller emails you) or printed calendars. Here are a few I like:
Here are the two calendars from Tina K. Photography that I bound to use as stocking stuffers:
The Bind-it-All isn't just for scrapping! Happy Binding :)
OZZ DT Member Jennifer Priest


