Showing posts with label Pinky Hobbs. Show all posts

Wednesday, August 29, 2012

Make Your Own Tri-Fold Frame!


Good morning Zutter friends, 

Pinky here today to share how to make your very own tri-fold frame from scratch
using your incredibly versatile Zutter Bind-It-All and Owires!
 Step 1. Trim out 4.5X6" chipboard. 3 pieces. 
 Step 2. Cover each piece (front and back) using patterned paper.
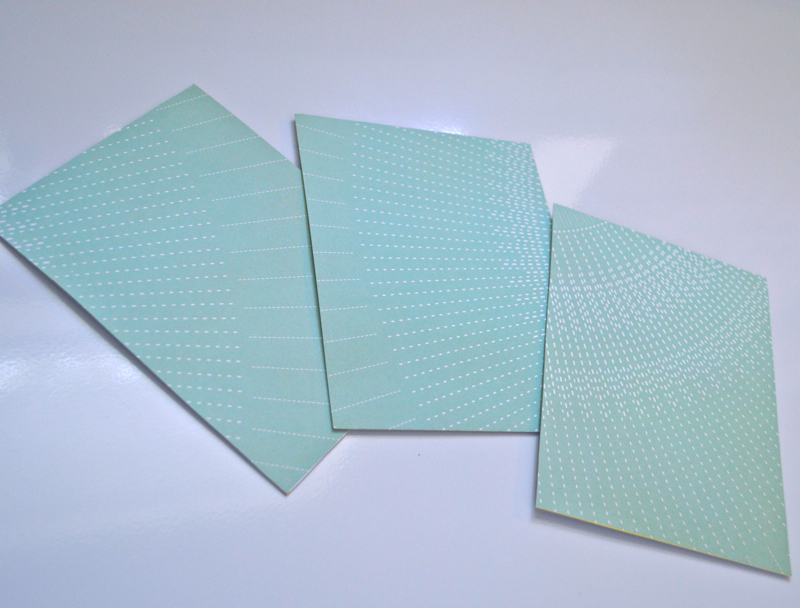
 Step 3. Using Bind-It-All- punch center binding holes on one side of each frame page.
(Use Cover Page setting).
 Step 4. Take middle frame page and punch out other side.
 This is what your frame pages will look like. 
 Step 5. Embellish and decorate pages. (or add photos)
 Step 6. Using 1/2"Antique Brass Owires & Zutter Bind-It-All machine- 
bind frame according to manufacturer directions.
 Stand your frame up and enjoy! Perfect to commemorate any occasion
or that work desktop. Easy, and totally fun. 


Monday, August 13, 2012

How Do You Do...BAMBOO!

Good morning Zutter friends, 
Pinky here with a fun book today, a Bamboo Spine Cover-Alls mini album!
When I found these I just fell head over heels for the amazing look. 
Let me share a quick tutorial on how I put this "Happy Day" album together. 


Step 1. Begin with 7X5.5 Bamboo Spine Cover-Alls book.
Using Clearsnap Smooch Spritz- spritz book all over, focusing steady spritz on spine. 

Step 2. Create your cover page & back cover page. To fit cover (Make 1/2" smaller).
One shown in photo. Trim paper to 7 1/4"X51/4". Trim second paper to 6"X4 3/4" adhere.
Stitch on sewing machine, add lace, stitch on machine. Repeat for back cover page. 
Step 3. Adhere cover pages to book cover- using strong adhesive. 
Step 4. Embellish cover as desired. 

For inside pages:
Step 5. Trim out several pages to desired size. 
Step 6. Using Zutter Bind-It-All punch out holes for O-Wires.
Step 7. Using insert page- punch out holes for O-Wire remember 
to use C-setting as shown in photo. 
Step 8. Using Zutter Wire Cutters- trim O-Wires.
Step 9. Flip insert page to front of pages, insert cut 1" O-Wire.
Step 10. Set Bind-It-All to 1" setting to accommodate 1" O-Wire
Press handle firmly. 
Step 11. Flip insert back over to back of pages. 
Step 12. Insert into Cover-All. 
When you are completed your book will look like this!
Ready for all those special memories and photographs, to be preserved for a lifetime. 
 I really hope you enjoys the post today, please come back and say hello.
I would love to hear from you all!


Sunday, July 29, 2012

Little Angels On A Clip Board!

Good morning Zutter friendz,

Pinky here with a fun little clip board mini book today. 
You know it's been such a fun summer this year with my friends and
family, and I have been doing so much crafting with my friend's
little girls lately, I thought I would make them little mini albums
to take around and share with their friends. 
I filled them with mini photos of our BBQ's, crafting days, and more!
I wanted something really sturdy, the Clip Board 3X4 mini album from
Zutter is perfect for this!!

Step 1. Using Bind-It-All 2.0 set to Cover Pages and
 3X4" Clip-Board Wood Covers carefully place wood in middle of
Bind-It-All and punch each cover separately. 
Step 2. Trim out 6-8 pages (using patterned paper) at 3X4".
Step 3. Using Bind-It-All 2.0 set to Inner Pages and paper from
step 2, punch pages. 
Step 4. Place pages into covers, roll back cover to the front. 
Step 5. Insert Antique Brass 1/2" Owire.
Placing Owire seam to the back of Bind-It-All
place in correct position. Press handle to close wires. 
Step 6. Embellish and create as desired. 

I cannot wait to pass these along to my little friends. 
I hope you had fun with today's mini album, until next time!


Friday, July 13, 2012

Distrezz Does Not Age You Just Your Pages!! **Video**

Hello Zutter friends,

Pinky here today with a wonderful vintage style layout
& VIDEO using my Zutter Distrezz-It-All. 
Sometimes when I am creating these family layouts I just 
want them to feel like an blanket that comforts you, or like
my grandmother's quilt. What could be better then stitching on my 
layout then distressing it to give it an aged look without the real aging!
I love how easy the Distrezz-It-All makes it to distress a 12X12 layout.
My hands get so tired when I am distressing by hand but this makes it so easy.


Here is a quick video sharing how I distressed this layout using my Distrezz-It-All. 


I love the comfy-warm feel this layout has and my children are sure to
cherish these memories for a very long time.


Friday, June 29, 2012

Switch It Up-Multi Purpose Banners!

Good morning Zutter friends, 
Pinky here with a fun "interactive" banner today.
When I saw these pink O'Wires I instantly wanted to make a fun project
after thinking for a couple days I decided to make a banner, and what better
way to incorporate the amazing Bind-It-All to make it multi purpose!

The front of this banner makes a cute girl's banner, but if you 
flip the back page over it's the perfect party banner. You could do this with seasons, 
holidays, party's, names...just imagine the endless possibilities.

Step 1. Create your banner pieces, for this banner create 10 (5 for Party & 5 for name).
Step 2. Cut 10 alternating pieces 1/2" smaller. 
 Step 3. Stitch each individual piece together. (Sort)
Step 4. Depending on thickness separate into 3-4 pieces for use in Bind-It-All machine.
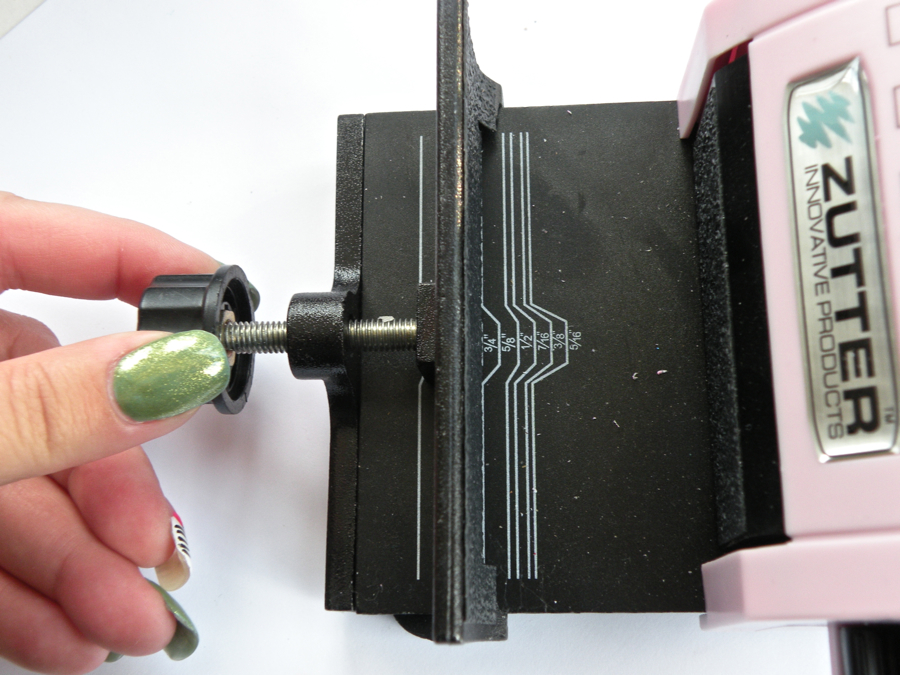
Step 5. Punch amount of holes needed using Bind-It-All.
]
 Step 6. Empty punched paper from side of Bind-It-All.


 Step 7. Adjust Zutter Bind-It-All to 3/4" for 3/4" O'Wires 
(size according to what chosen O'Wire is)
Step 8. To ensure proper O'Wire placement, bring the back banner
 (PARTY) to the front and press handle firmly.
Step 9. Flip front of banner back into place, and embellish. 
Step 10. Thread 1 1/2" vintage lace through each binding. 
Step 11. Using same lace- tie bow in between each banner piece. 
Here you can see each side of the banner. 
Just have fun with it! You could make it with 4-5 layers if you
 come up with the right words and pieces!

I hope you enjoyed today's idea. 
Until next time-


Wednesday, June 13, 2012

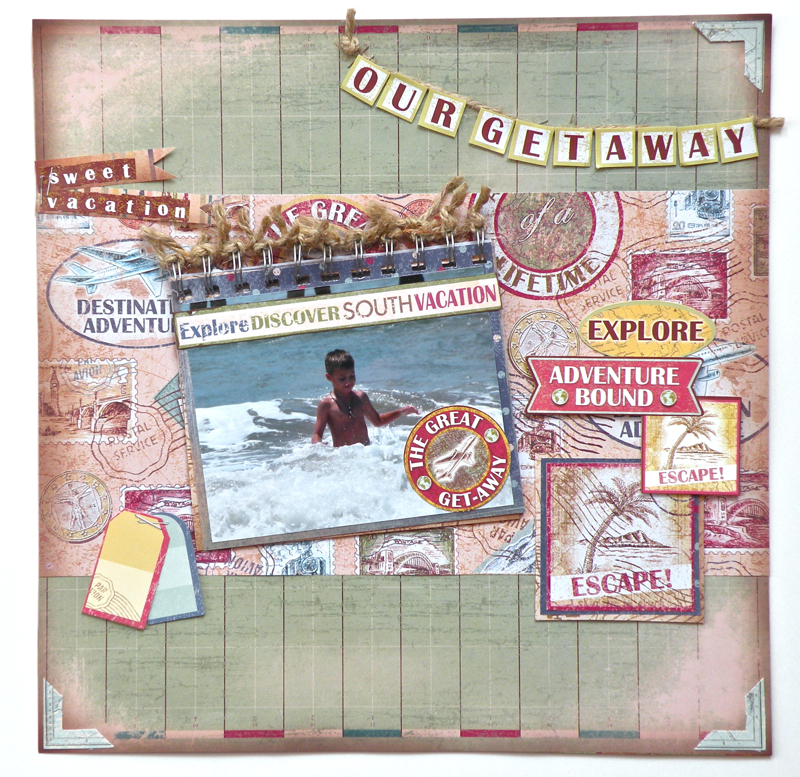
Beach & Twine Your Are So Fine!

Good morning Bind-It-All friends,
Pinky here with a fun way to scrapbook MANY photos at once and
make your pages more interactive.  

I don't know about you but I am a layering fool, that got me to thinking
why not make a mini album of photos of sorts and put it right on my 
scrapbook page? Using the Zutter Bind-It-All and the 1/2" O-Wires I 
created this scrapbook page that features SEVERAL photos. 

A Photo Flip!

Since this is a very "beachy" layout I added twine to every
single O-Wire for a fun beachy feel...it blends perfectly.
Let me share with you a how-to on making the photo flip. 
Step 1. Trim all photos to uniform size. These are trimmed to 4"X5"
Step 2. Matte each photo leaving extra 1/2" at the top for binding purposes. 
Also trim out one piece of card stock with no photo for backing. 
The matting size shown is 5 1/2"X4 3/4".
Step 3. Using your Bind-It-All 2.0 set to D- Inner Pages, punch out binding holes. 
Step 4. Align punched photos, flip back paper over, using Zutter Bind-It-All 2.0 
and 1/2" binding O-Wires, bind together. 
Step 5. Flip back page to the back, and adhere onto layout. 
Step 6. Carefully thread twine through each O-Wire and tie into knots, trimming off excess. 
Step 7. Using strong adhesive- adhere knots to page for added strength and security. 
Now you can enjoy 6-10 photos on one page. 
Such a fun way to showcase an entire vacation or event. 
I hope you were inspired to think outside the box and inside the Bind-It-All
for scrapbooking and beyond! Until next time-

Supplies: